How to Install Dryer Vent Hose: Step-by-Step Guide
Discover how to install a dryer vent hose with this thorough step-by-step guide. Boost your dryer’s efficiency, reduce fire hazards, and keep your laundry routine running smoothly!
Installing a dryer vent hose might not seem like a flashy weekend project, but, oh boy, is it ever important! If you’ve ever noticed that your clothes take longer than usual to dry, or that your laundry room heats up like the Sahara, your dryer vent system might be the culprit. A proper vent hose ensures hot, moist air escapes your dryer efficiently. Without it, you’re looking at potential mold buildup, increased fire risk, and sky-high energy bills.
But don’t go throwing in the towel just yet! With the right tools and a little bit of elbow grease, you can keep your dryer running in tip-top shape for years to come. This article will walk you through all the ins and outs (pun intended) of vent hose installation. So kick back, grab a cup of coffee, and let’s embark on this how-to adventure together!
1. Why Proper Vent Hose Installation Matters
Have you ever stopped to wonder why there’s a heavy emphasis on dryer vent hoses? After all, your dryer comes with a built-in lint trap, right? Sure, but that screen can only catch so much. Over time, tiny bits of lint slip through and accumulate in the vent hose or duct. If the hose is old, disconnected, or clogged, hot air (and lint) can back up and become a serious hazard.
Fire Safety: A clogged vent or poorly installed hose can raise the risk of dryer fires. When lint and hot air build up, things can get dangerously hot in a hurry.
Energy Efficiency: Ever notice your dryer taking two cycles to finish one load? With a poorly installed vent hose, your dryer has to work overtime—jacking up your electric bill.
Mold and Mildew Prevention: Moist air that doesn’t have a direct escape route can linger in walls and attics, contributing to mold growth.
Longevity of Your Dryer: Excessive heat causes your dryer to wear out faster. Proper ventilation helps it stay efficient and last longer.
Imagine you’ve got a sports car but the exhaust pipe is partially blocked. You’d be robbing yourself of performance, speed, and safety. The same principle applies to your dryer. By installing a vent hose properly, you’re opening up the highway to let all that hot, moist air out, unimpeded. And that’s how you keep everything running smooth as butter!
2. Gathering Your Tools and Materials
Before you jump in and start yanking the old hose off, make sure you’ve got everything you need. After all, nobody wants to realize halfway through that they're missing a key component. Here’s a handy list to help you get your ducks in a row:
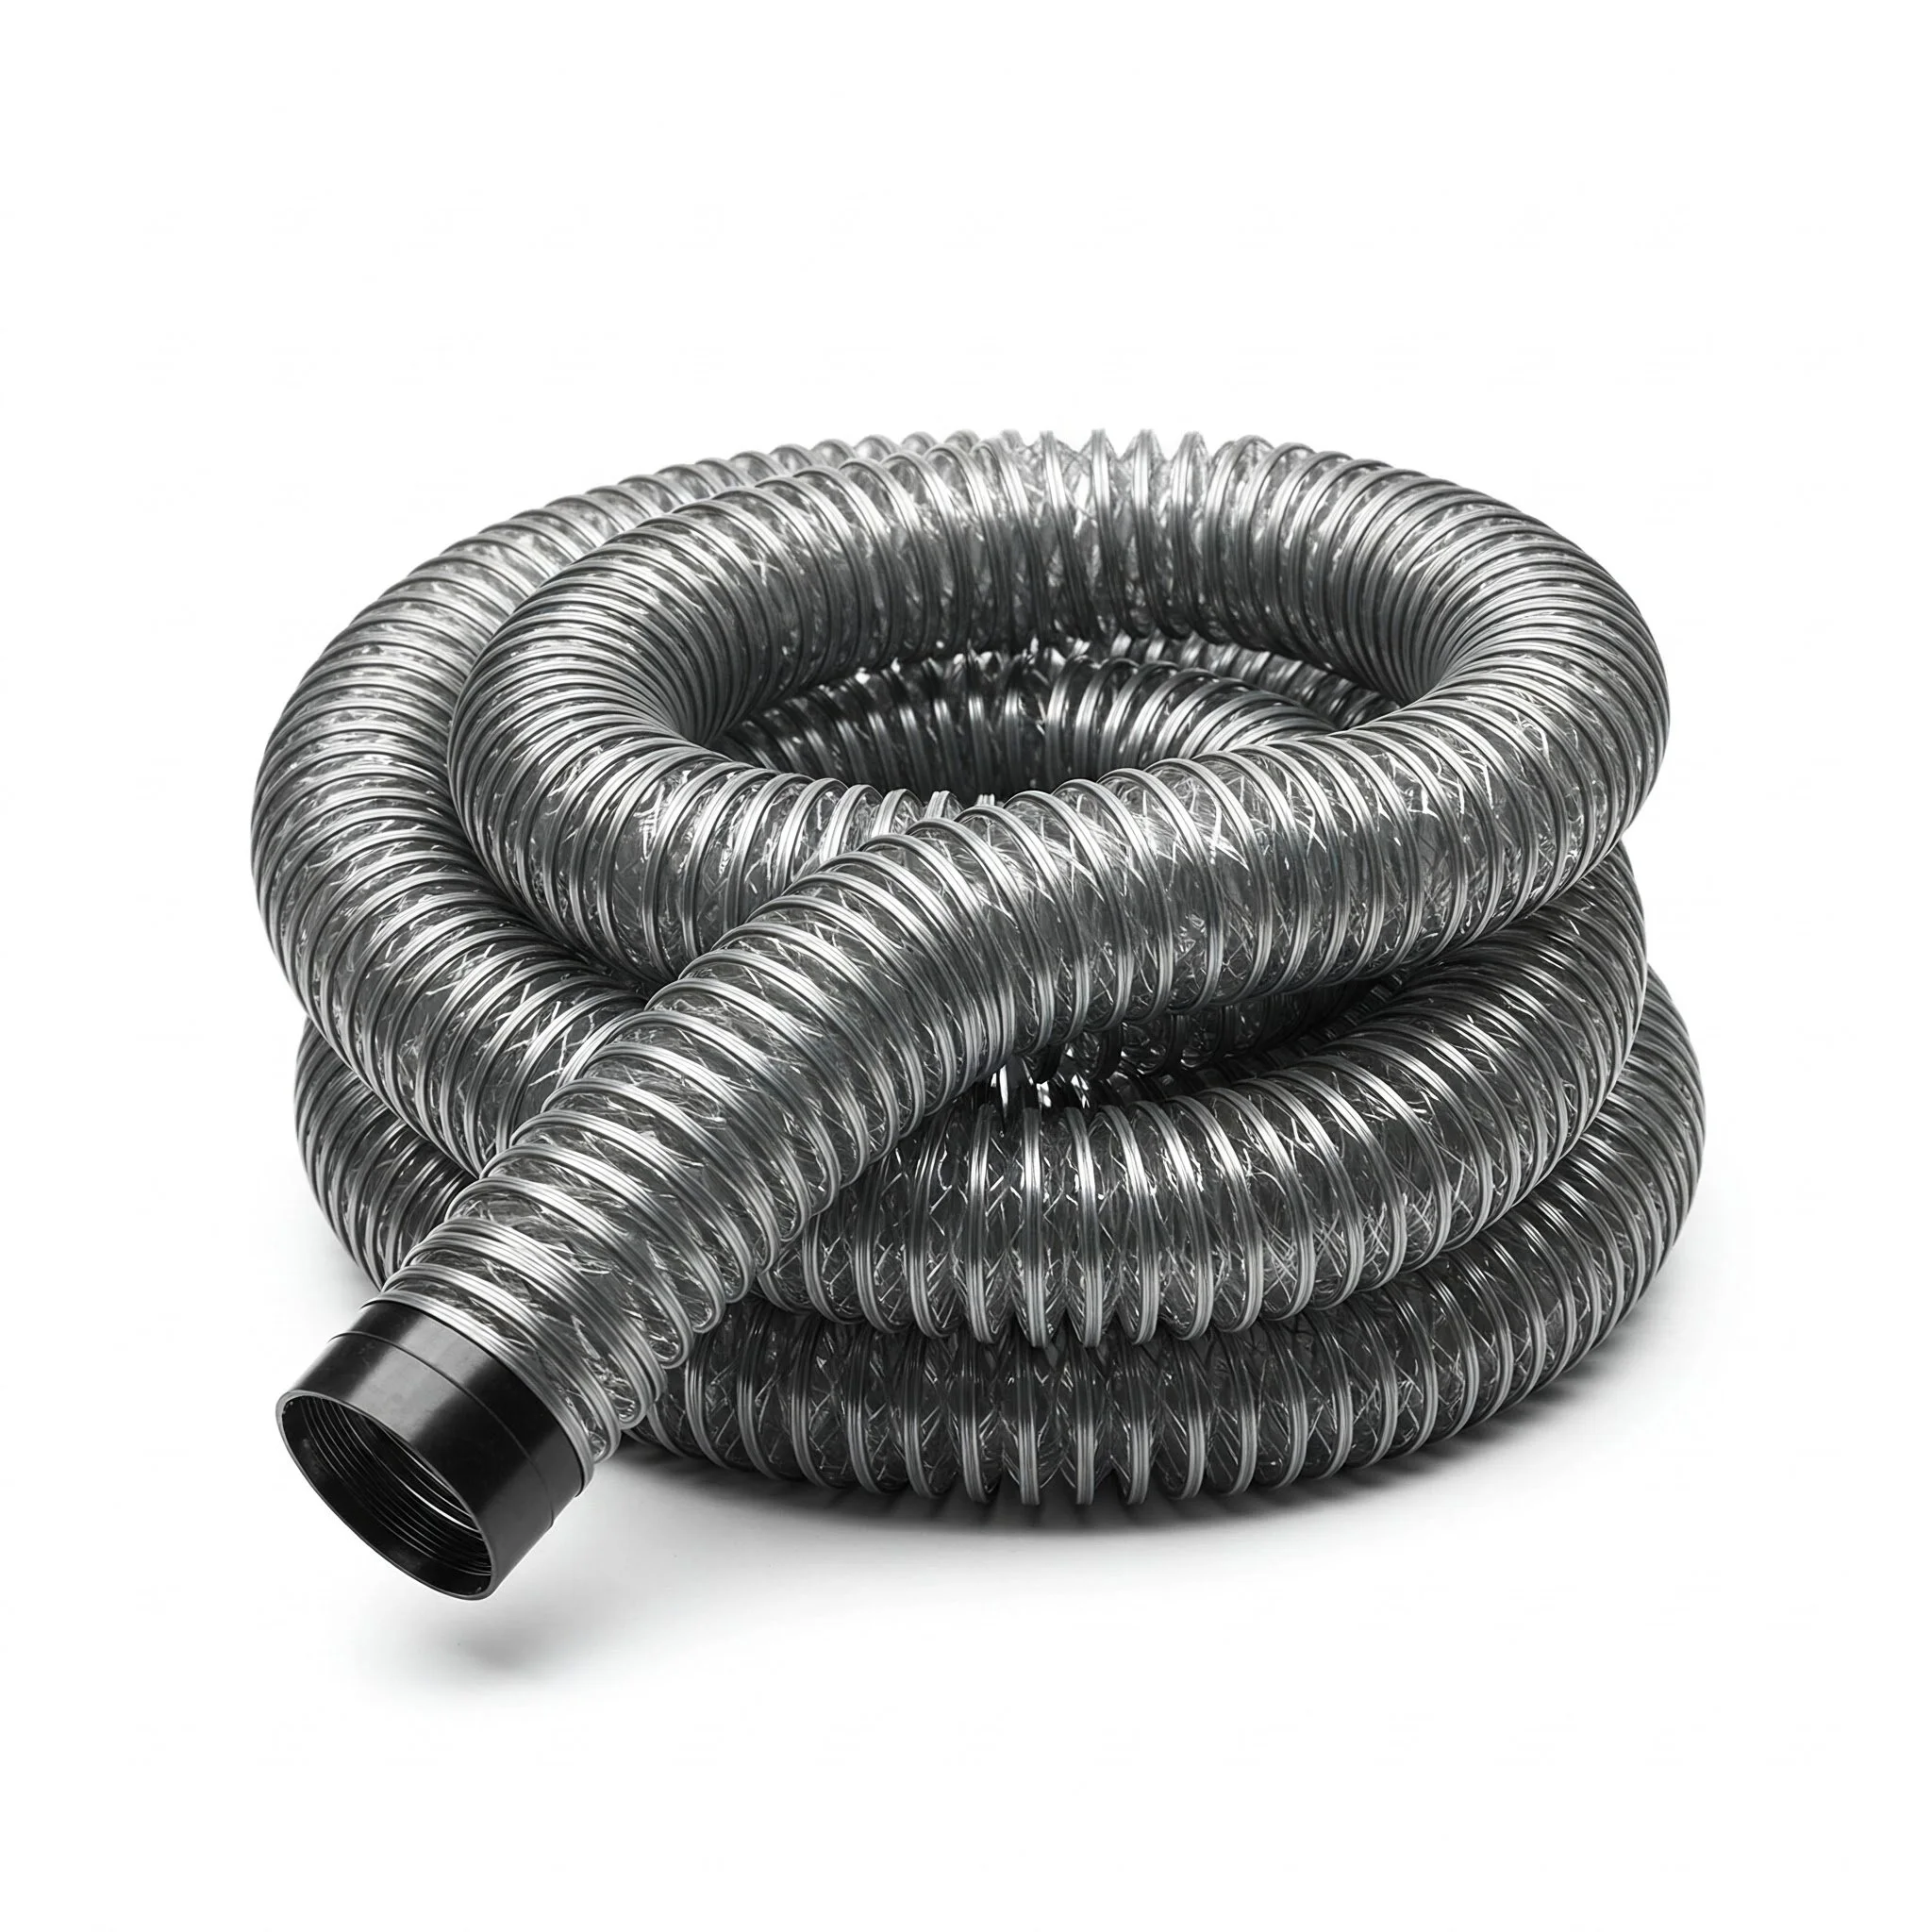
Dryer Vent Hose (Flexible or Rigid): Choose a UL-listed, flexible metal or rigid metal vent. Plastic or foil hoses are more prone to kinks and can be potential fire hazards.
Clamps or Duct Tape: Metal clamps or UL-approved aluminum foil tape are typically recommended over traditional duct tape, which may dry out or lose adhesion over time.
Screwdriver or Nut Driver: You’ll need this to tighten the clamps in place.
Measuring Tape: Make sure you measure the distance between your dryer and the exterior vent so you know how long your hose should be.
Marker or Pencil: For marking the hose length or the spots where you’ll secure it.
Utility Knife or Scissors: In case you need to cut the vent hose to the right length.
Wall Cap or Vent Cover: If your exterior vent is old or damaged, you might want to replace it with a sturdy, bird-proof vent cover.
Keep in mind, it never hurts to have a flashlight, gloves, and some rags for wiping up dust or lint. You might be sticking your arm in some tight spaces or behind bulky appliances. A little prep goes a long way.
3. How to Install Dryer Vent Hose: Step-by-Step Guide (First Mention)
Alright, let’s cut to the chase! This is the main event, the pièce de résistance. Here, we’ll break down everything you need to know in a simple, easy-to-follow manner. Let’s get going!
Step 1: Disconnect the Power
Safety first, folks! Unplug your dryer from the wall. If it’s a gas dryer, turn off the gas supply valve to avoid any surprises. This step ensures you won’t get zapped or accidentally ignite something while wrestling with the vent hose.
Step 2: Pull Out the Dryer
Gently slide your dryer away from the wall. Be mindful of your floor and the dryer’s exhaust port. You want to create enough space to maneuver behind it without bumping into or damaging the vent.
Step 3: Remove the Old Hose
If there’s an existing hose, loosen any clamps or tape holding it in place. Slide it off both the dryer’s exhaust port and the wall or floor vent. Inspect this old hose. Is it cracked, brittle, or filled with lint? Toss it in the trash. Time for a fresh start!
Step 4: Measure and Cut the New Hose
Hold the new vent hose up to the space between the dryer and the wall. Use your measuring tape to determine how much hose you need. Add a bit of extra length so you can move the dryer without yanking the hose loose. If you have excess, trim it down with your scissors or utility knife.
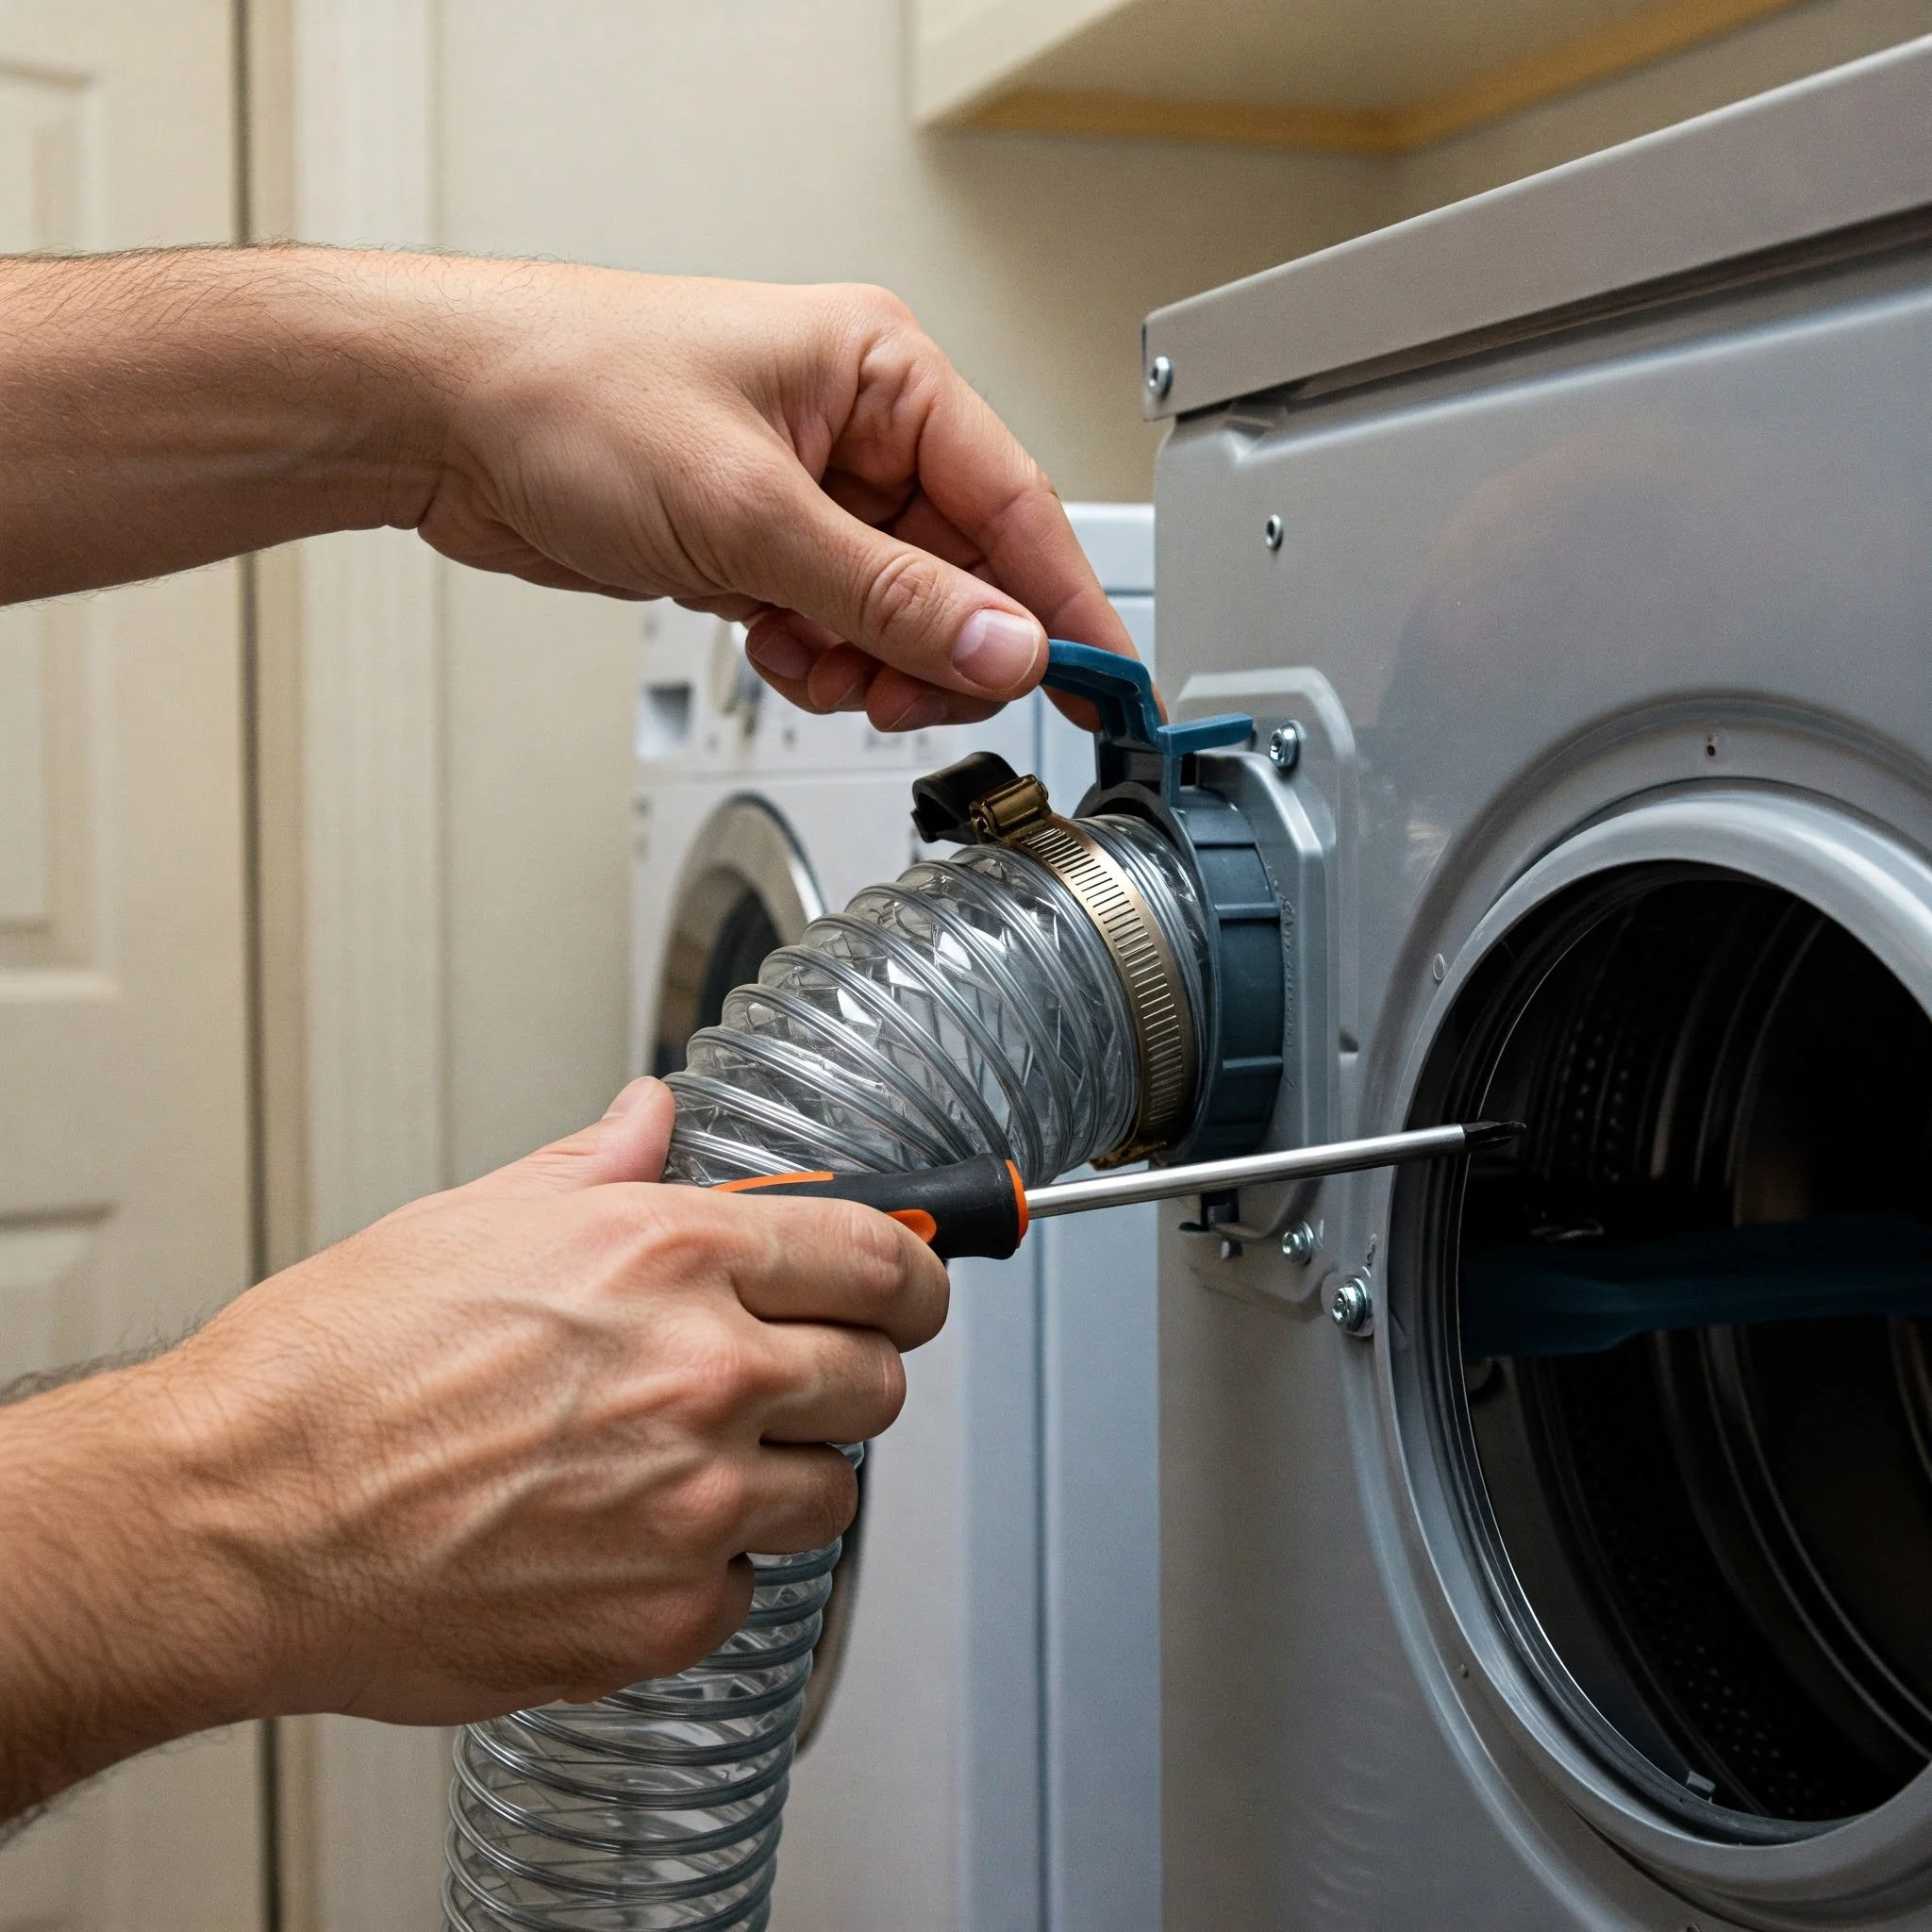
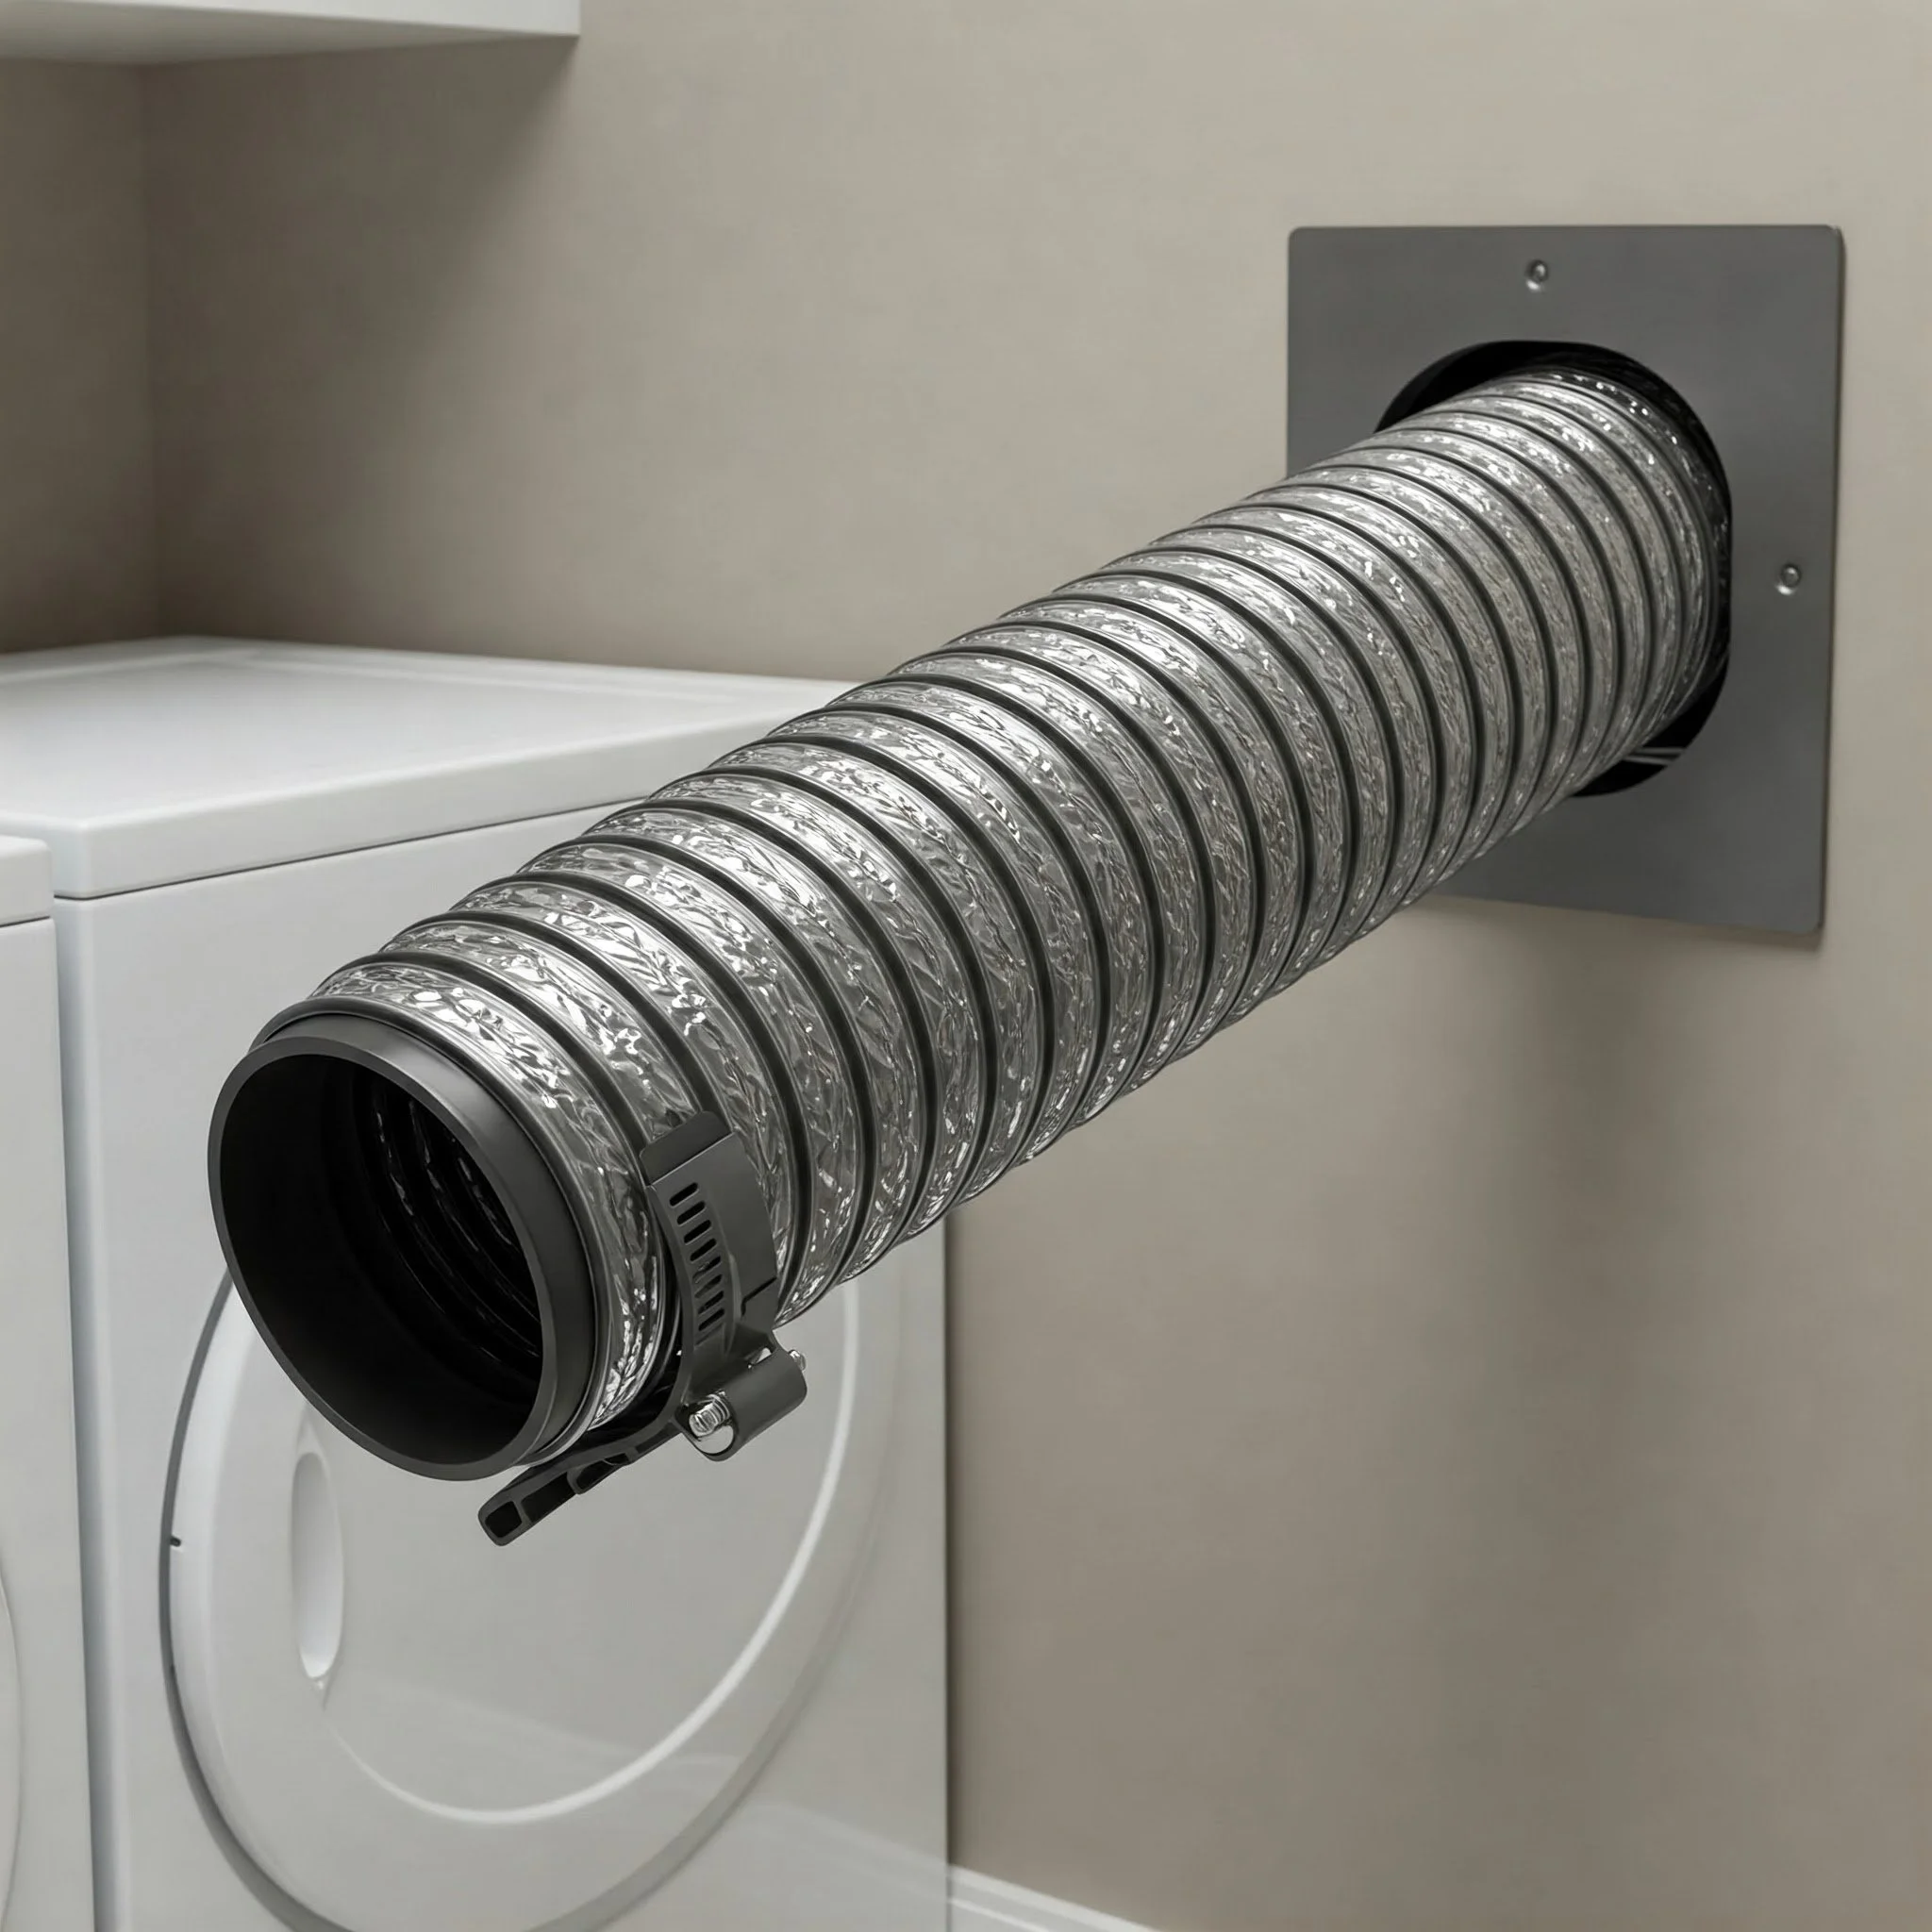
Step 5: Attach One End to the Dryer
Open your clamp and place it around one end of the hose. Slide that hose end onto the dryer’s exhaust port. Use a screwdriver or nut driver to tighten the clamp. Give it a little tug to be sure it’s secure.
Step 6: Attach the Other End to the Wall Vent
Repeat the same process on the wall vent (or floor vent, depending on your laundry room’s setup). Make sure the hose fits snugly. If your vent is in an awkward spot, consider getting a vent elbow to ease the transition and avoid kinks.
Step 7: Secure the Hose
Use clamps or UL-listed foil tape to seal any small gaps around the connection points. The goal is to keep every bit of lint and hot air traveling down the hose and out of your home, rather than leaking into your laundry space.
Step 8: Slide the Dryer Back
Carefully push the dryer toward the wall. Make sure you don’t kink or crush the vent hose. A crushed hose restricts airflow and defeats the whole point of this project!
Step 9: Power Up
Plug your dryer back into the outlet. If you have a gas dryer, turn the gas valve back on. Now’s the moment of truth!
Step 10: Test It Out
Run the dryer on a short cycle. Check around the hose to make sure you don’t feel any escaping air. Head outside to ensure air is flowing properly from the exterior vent. If everything’s blowing and going, congratulations—you’ve just tackled the “How to Install Dryer Vent Hose: Step-by-Step Guide” like a pro!
4. Choosing the Right Vent Hose
When it comes to dryer vent hoses, there’s no one-size-fits-all solution. So how do you pick the right one? Well, that depends on your priorities:
Flexible Metal Hoses: These are common, relatively cheap, and easy to install. However, they can get crushed or kinked if you’re not careful.
Semi-Rigid Metal Hoses: Slightly sturdier than flexible hoses. They can still bend around corners but hold their shape better.
Rigid Metal Ducts: The most durable option with smooth walls that allow for optimal airflow. However, they’re not as easy to maneuver in tight spaces.
Avoid Vinyl or Plastic: They don’t meet modern safety codes in many places due to higher fire risks.
Remember, the shortest, straightest route from your dryer to the outside is always the best path. The fewer bends you have, the easier the airflow—and the lower your energy costs.

5. Maintaining Your Dryer Vent Hose
You might think once your hose is in place, you’re done for good. But guess what? Even the best vent hoses need a little TLC to keep them working at peak performance. Here’s how:
Clean the Lint Trap After Every Load: This might sound obvious, but you’d be surprised how many people forget. A clean lint trap drastically reduces lint buildup in the vent hose.
Inspect the Hose Monthly: Give it a quick once-over. Is it still connected securely? Any signs of wear or damage? Catching small problems early keeps them from becoming big headaches later on.
Deep Clean the Duct Yearly: Use a dryer vent brush or a vacuum attachment to remove lint inside the hose. Lint is sneaky; it likes to hide where you least expect it.
Check the Exterior Vent: Ensure the flap or vent cover isn’t clogged by leaves, bird nests, or debris. A blocked exterior vent means no airflow—and that’s trouble!
By keeping tabs on your vent hose, you’ll keep your dryer purring like a well-oiled machine.
6. How to Install Dryer Vent Hose: Step-by-Step Guide (Second Mention)
You might be thinking, “Didn’t we already cover how to install the hose?” Absolutely! But it never hurts to see the phrase “How to Install Dryer Vent Hose: Step-by-Step Guide” once again, especially if you’re skimming or revisiting for quick reference. Having the key phrase repeated helps jog your memory and ensures you won’t miss any crucial details. After all, mastery often comes from repetition, right?
7. Common Pitfalls and How to Avoid Them
Even the savviest DIYers can stumble upon a hiccup or two. Let’s head off some of the most common pitfalls:
Neglecting to Measure Properly: If your vent hose is too short, it’ll get pulled off every time you move the dryer. Too long, and it might kink or coil, restricting airflow.
Using the Wrong Tape: Regular duct tape can lose its stickiness with heat. Always use aluminum foil tape or metal clamps.
Skipping the Exterior Vent Check: Ensuring the outside vent flap opens and closes freely is critical. If it’s jammed shut, that hot air isn’t going anywhere.
Shoving the Dryer Too Close to the Wall: Compressing the vent hose is like tying a knot in a garden hose—nothing gets through.
A little planning and a bit of elbow grease go a long way toward avoiding these snafus.
8. Troubleshooting Tips and Tricks
If you’ve followed every step but still notice your dryer isn’t performing as well as you’d hoped, don’t throw in the towel! Here are some next-level strategies:
Check for Hidden Lint Build-up: Use a flashlight to inspect deeper into the duct or behind the dryer. Sometimes lint accumulates in unexpected places.
Install a Vent Elbow: If your dryer is jammed up close against the wall, an elbow can help reduce the risk of kinks.
Upgrade Your Exterior Vent Cover: A high-quality vent cover with a secure flap prevents pests from sneaking in and blocks external debris.
Consider a Vent Booster Fan: If your vent run is especially long, a booster fan can help maintain consistent airflow.
Sometimes, the best solution is just to step back and take another look. Did you accidentally pinch the hose? Did you attach the hose in reverse? (Yes, some folks have done that!) A few minutes of detective work is usually all it takes to pinpoint the issue.
Conclusion
Congratulations, you’re now well-versed in dryer vent wizardry! Installing a dryer vent hose may not be the most glamorous home improvement task, but it’s essential for safety, efficiency, and peace of mind. When you take the time to learn How to Install Dryer Vent Hose: Step-by-Step Guide, you’re not just ticking a chore off your to-do list—you’re investing in the longevity of your appliances and the well-being of your home.
Remember, the key to success lies in choosing the right vent hose, securing all connections, and performing regular maintenance. Don’t let this vital system fall to the wayside; a little upkeep goes a long way in keeping your dryer humming along for years. And hey, if you ever get stuck or feel overwhelmed, there’s no shame in calling in a professional. Sometimes, it’s worth the extra few bucks for that added peace of mind.
Now that you know how it’s done, there’s just one question left—are you ready to roll up your sleeves and get to work? Don’t wait until your dryer starts acting up or your laundry room feels like a sauna. Keep that hot air flowing out into the great wide open, and enjoy fresher-smelling clothes and a safer, happier home!
Frequently Asked Questions
Q1. How often should I clean or replace my dryer vent hose?
A: You should give your dryer vent hose a quick inspection at least once a month to ensure it’s still properly connected and free of major debris. Plan a more thorough cleaning every six to twelve months, depending on your usage. If you notice tears or excessive wear, replace it immediately.
Q2. Can I use a plastic or vinyl hose?
A: It’s strongly discouraged. Plastic or vinyl vent hoses aren’t up to code in many areas because they’re more prone to catching fire. A metal hose—flexible, semi-rigid, or rigid—is your safest bet.
Q3. Is it okay to vent my dryer indoors?
A: Generally, no. Venting indoors releases hot, moist air into your home, which can lead to mold growth and damage walls or ceilings. Some specialty setups do exist for certain climates or appliances, but they’re rare and require professional advice.
Q4. What if my exterior vent is too far from my dryer?
A: You can use rigid ducting or a combination of rigid and semi-rigid sections to cover the extra distance. Just make sure you keep bends to a minimum and secure all connections properly.
Q5. Do I need a professional to install my dryer vent hose?
A: In most cases, no! How to Install Dryer Vent Hose: Step-by-Step Guide is straightforward enough for many DIY enthusiasts. However, if you’re dealing with gas connections, multiple tight bends, or tricky vent routes, it never hurts to consult a professional.
Stay up to date with our latest ideas!