How to Attach a Pedestal Sink: Step-by-Step Guide
Learn “How to Attach a Pedestal Sink: Step-by-Step Guide” for a smooth, stylish bathroom upgrade. Discover tools, tips, and best practices to install your pedestal sink without a fuss and give your space a fresh, modern look!
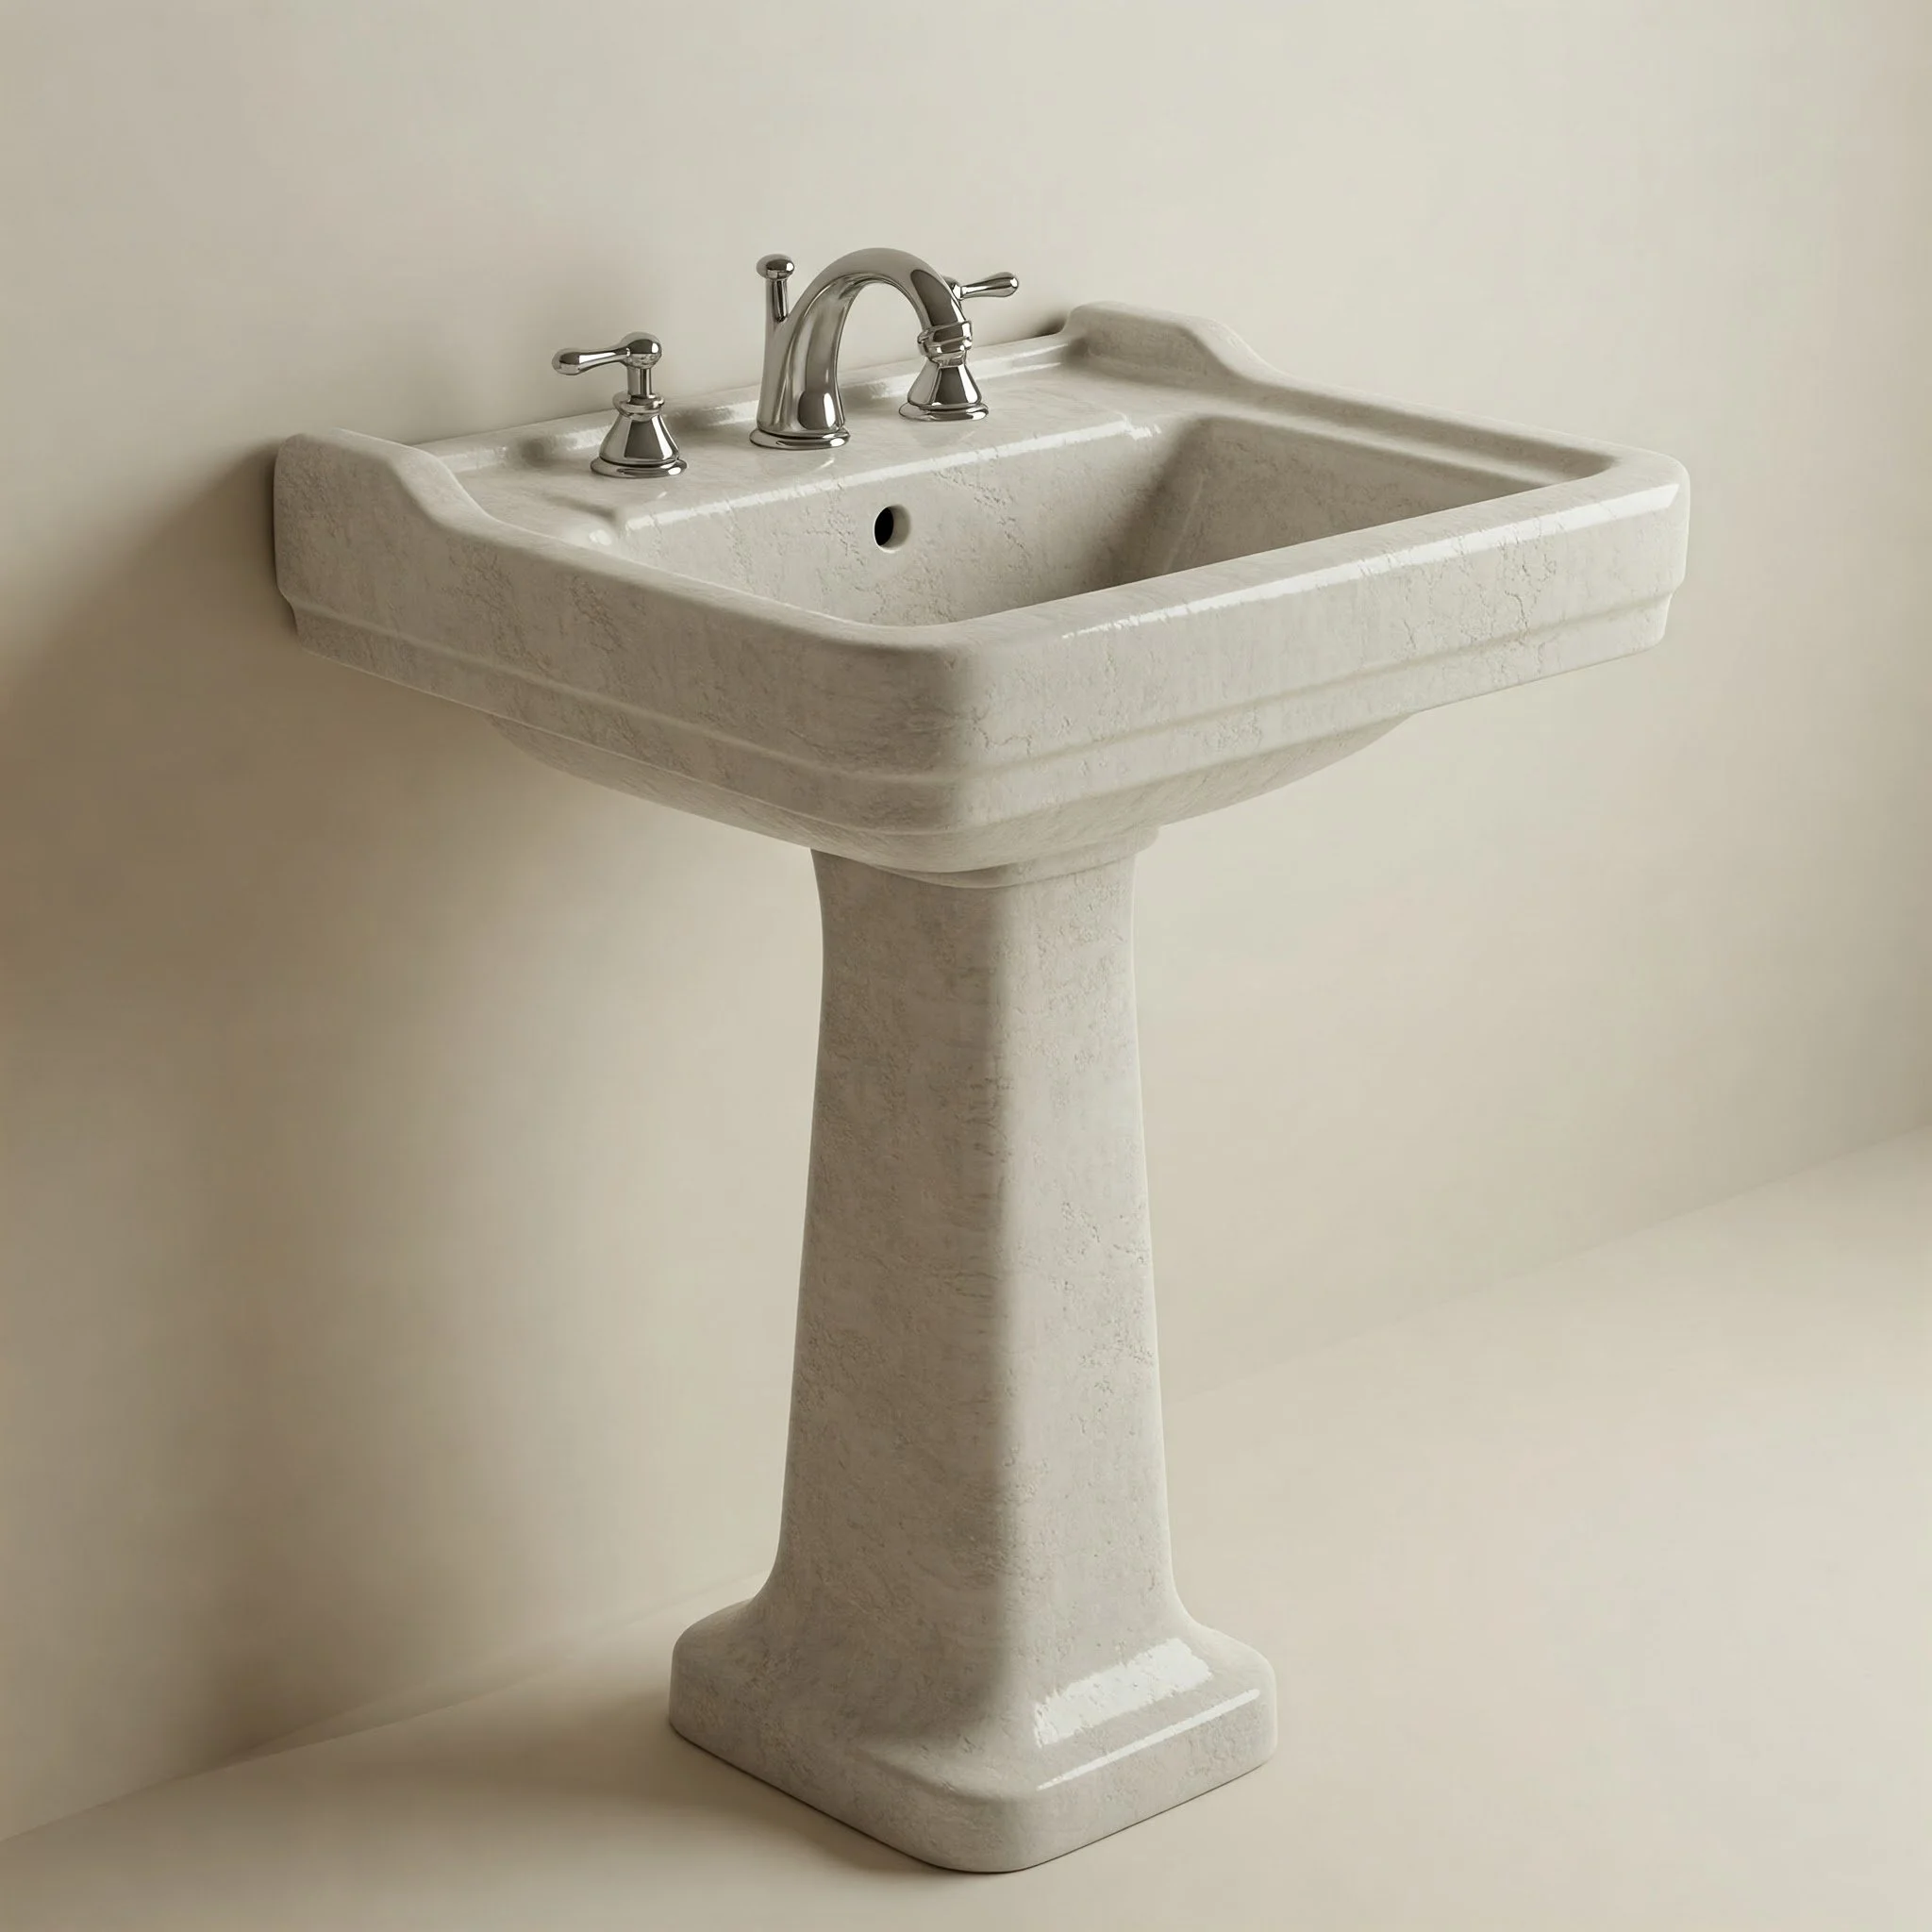
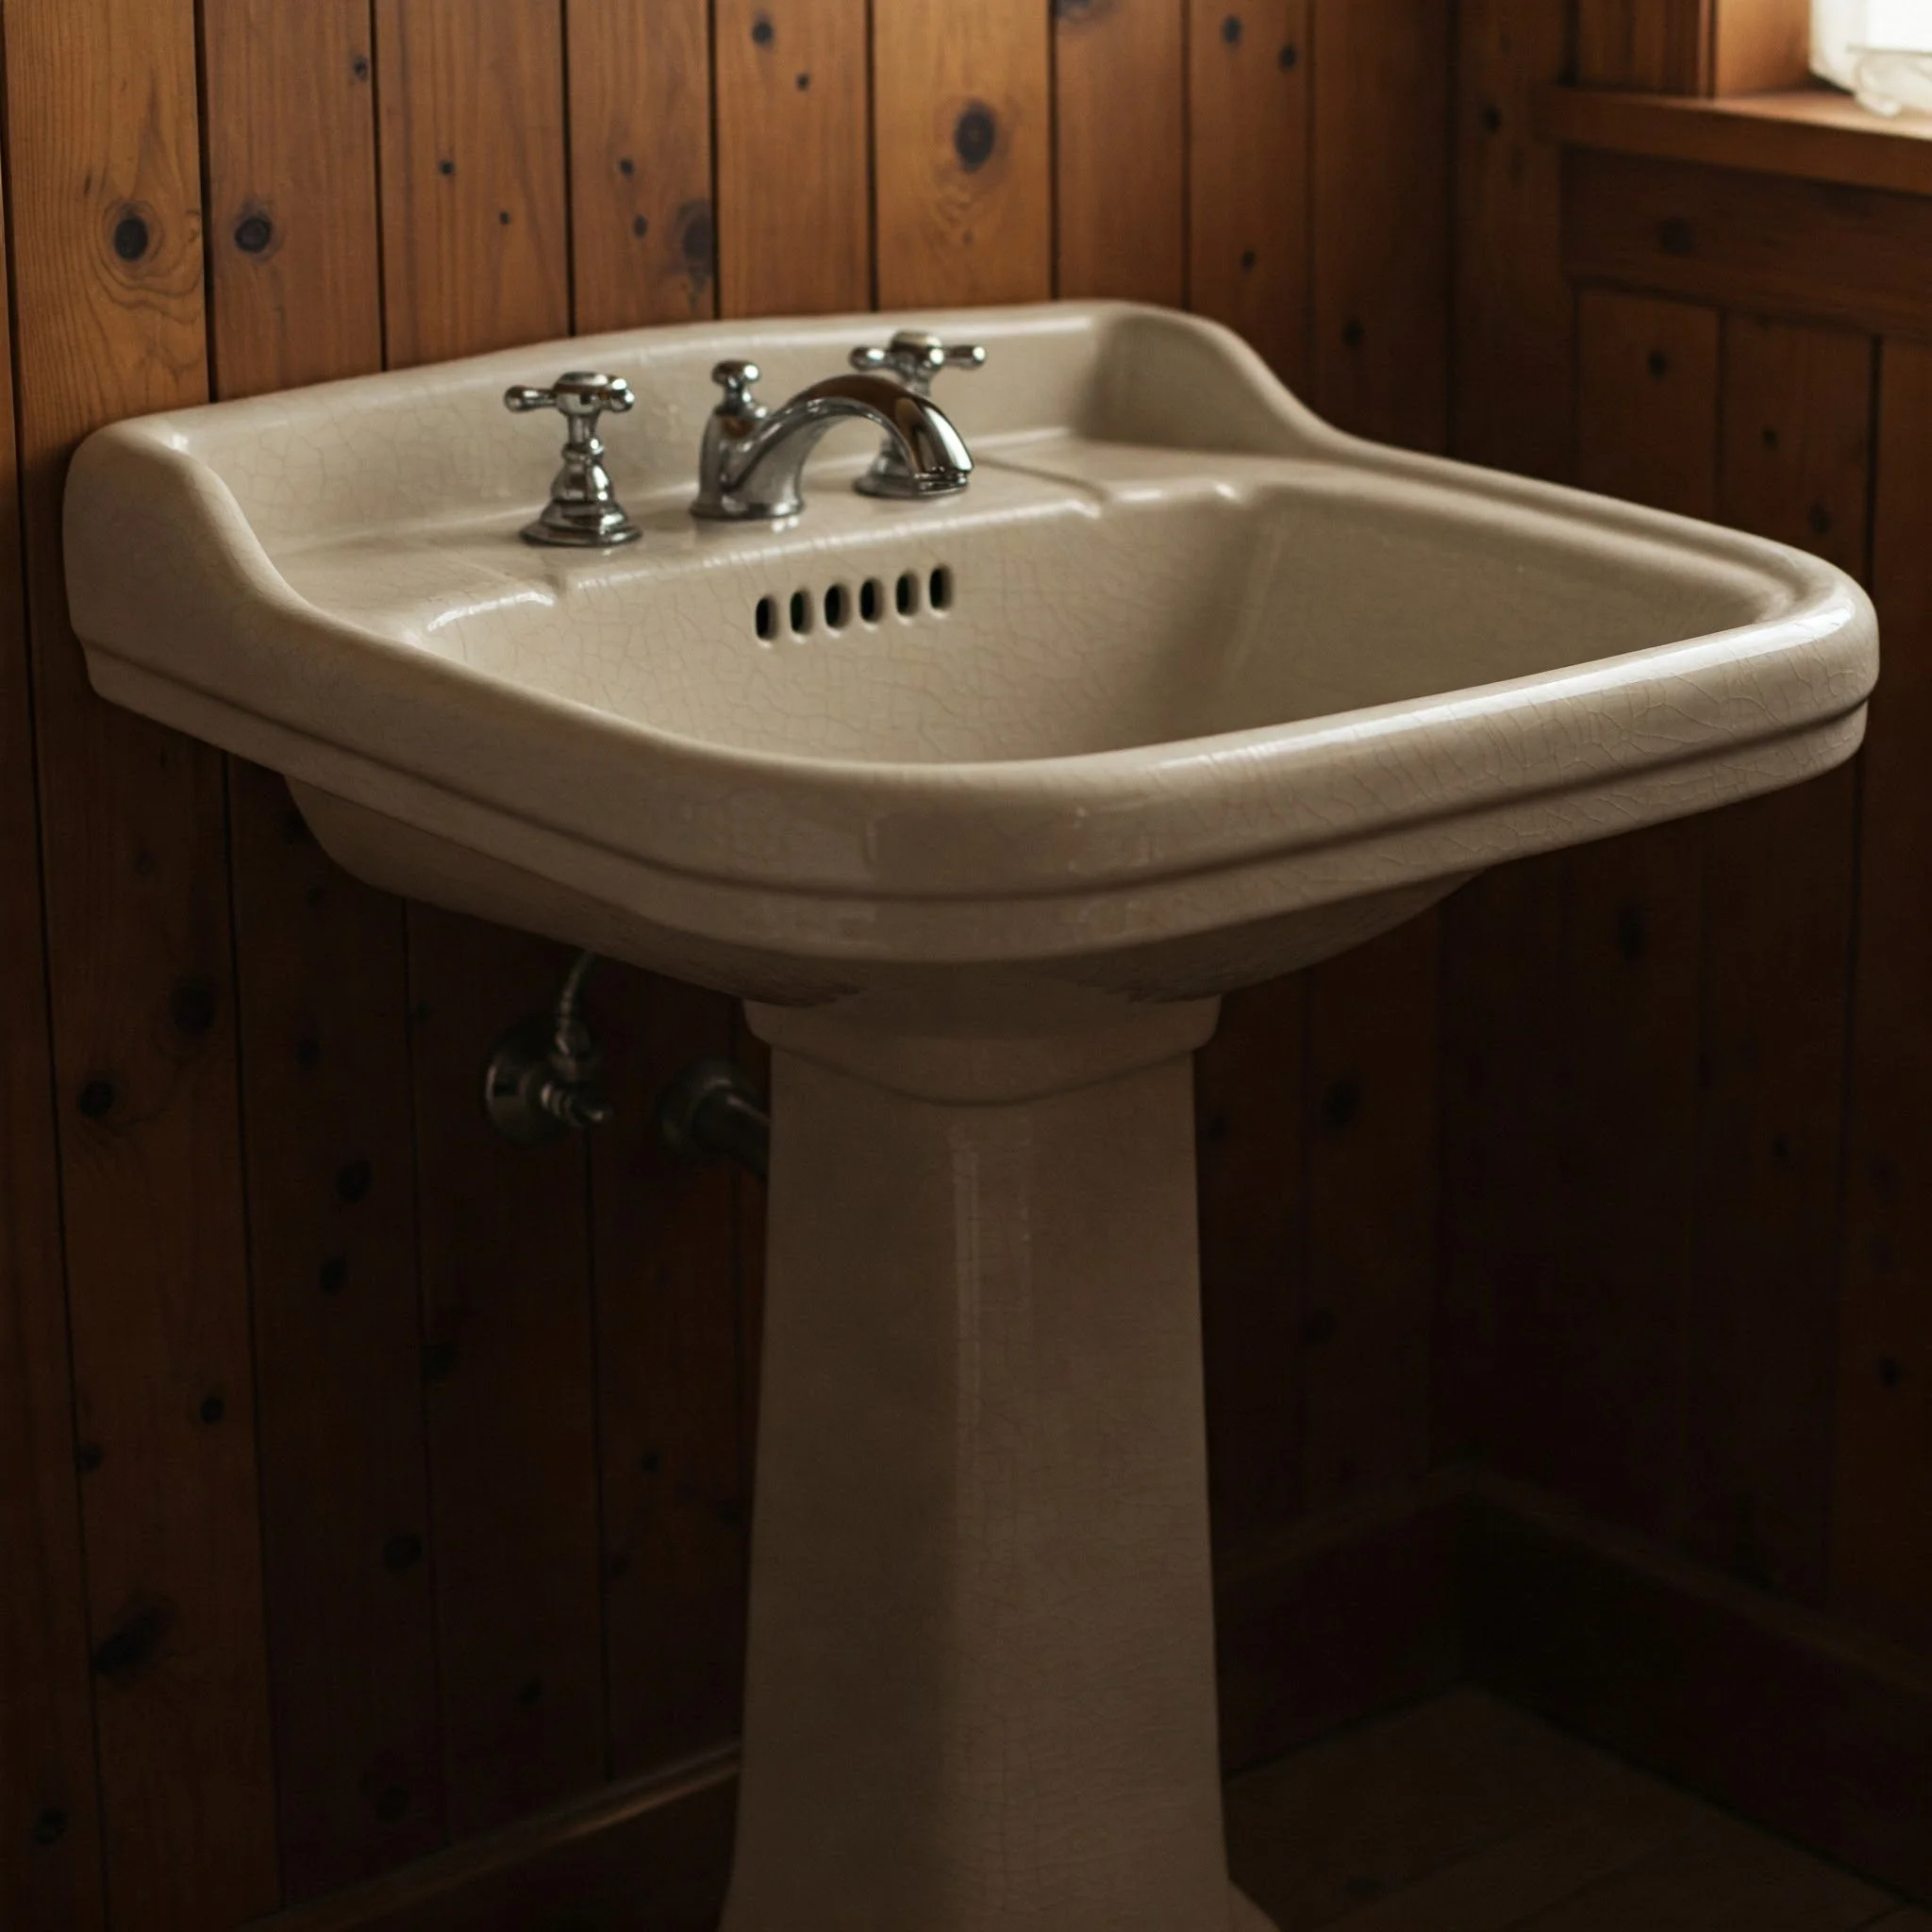
Ever walk into your bathroom and think, “Gosh, this place needs a little pick-me-up?” Believe me, you’re not alone! One of the quickest ways to jazz up your lavatory is by installing a sleek pedestal sink. When done correctly, a pedestal sink can be a real showstopper—like the bathroom version of a red-carpet gown. But, if you’re scratching your head and wondering, “How on earth do I attach one of these things?” you’ve come to the right place! Because today, we’re covering the nitty-gritty details of How to Attach a Pedestal Sink: Step-by-Step Guide.
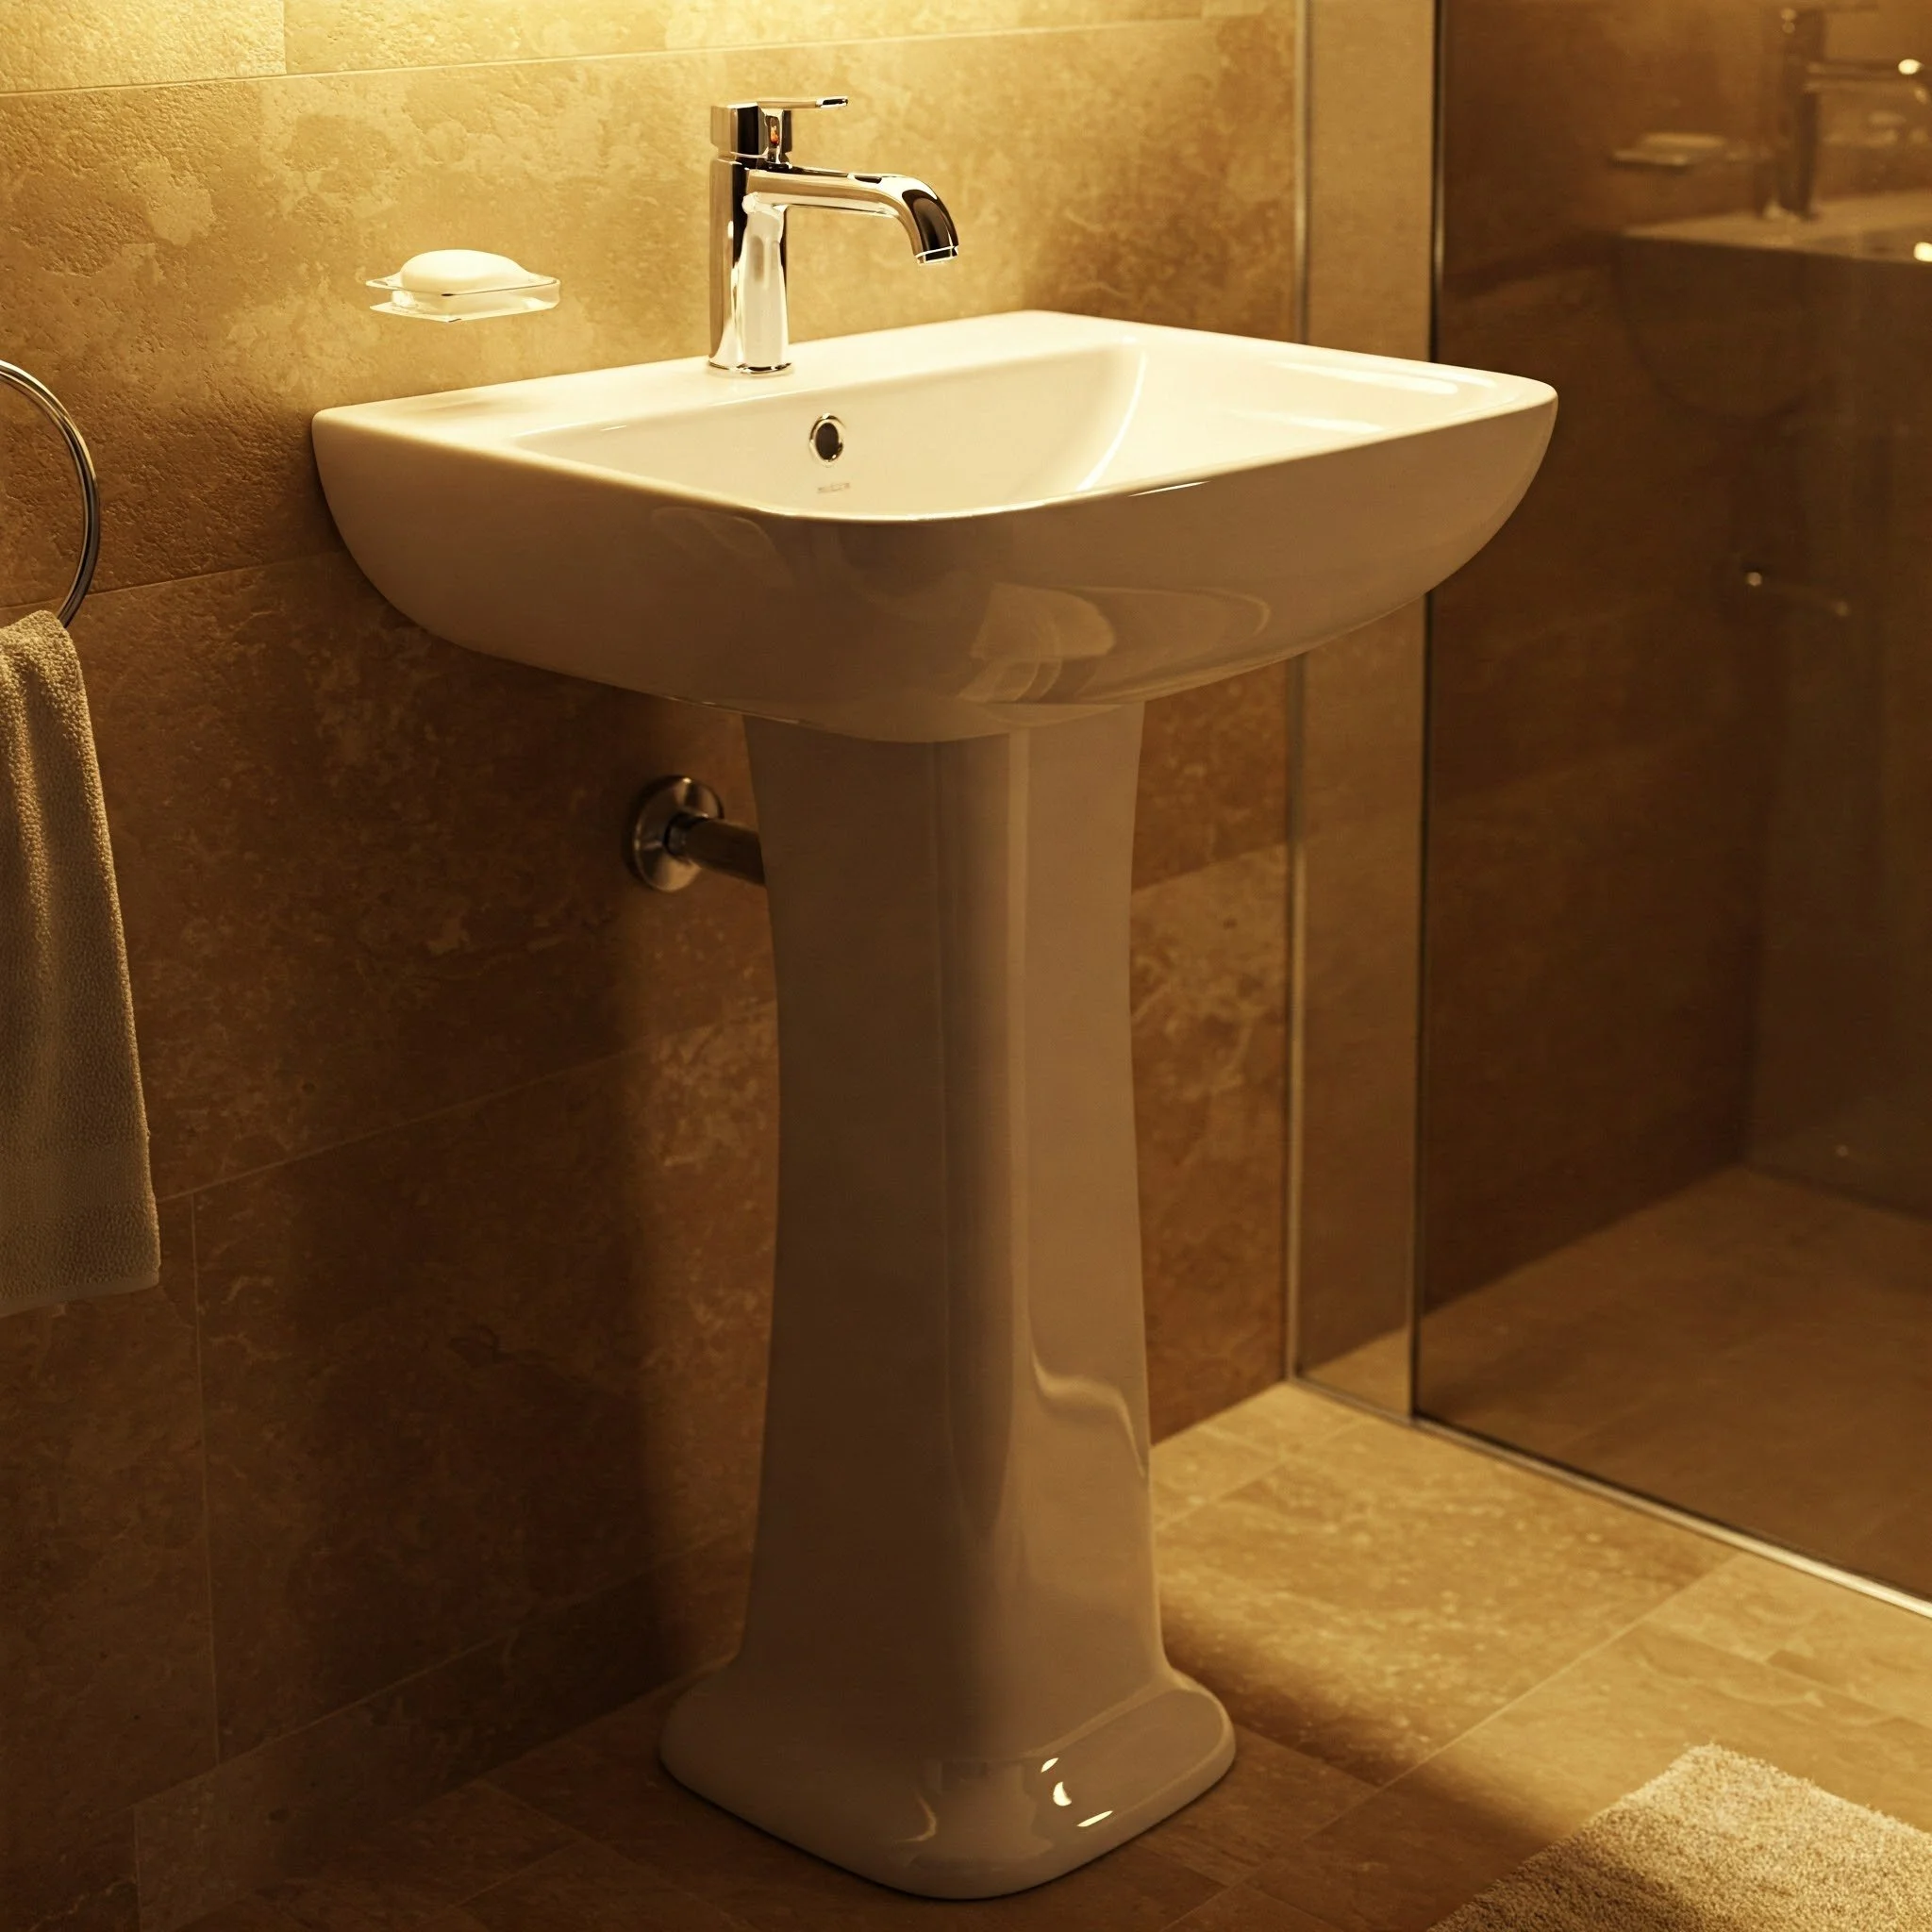
Forget about big, bulky vanities that crowd your space. Pedestal sinks are the perfect option for folks who crave a more open, airy feel in the bathroom. The best part? You can totally tackle this home-improvement project on your own (with a bit of patience, elbow grease, and the right tools). So, roll up those sleeves, slip on some comfy clothes, and let’s get down to business!
Why a Pedestal Sink?
Before we deep-dive into The “How to Attach a Pedestal Sink: Step-by-Step Guide,” you might be wondering—why a pedestal sink in the first place? Well, these bad boys come with a bunch of benefits:
Space-Saving Design:
Pedestal sinks feature a streamlined shape that often takes up less real estate than a traditional vanity.
Perfect for smaller bathrooms or powder rooms where every square inch matters.
Timeless Aesthetic:
Sleek, chic, and oh-so-classy, pedestal sinks can fit into a variety of décor styles—modern, vintage, eclectic, you name it.
Their clean lines and minimal form help them blend seamlessly with just about any design scheme.
Easier Maintenance:
Fewer nooks and crannies mean less time scrubbing hard-to-reach corners.
With the plumbing partially exposed, you can spot any leaks or drips early on.
More Floor Space:
The open area beneath the basin can make the bathroom appear larger.
You also have room to store smaller decorative items or tuck away a basket of towels.
Less Clutter:
Pedestal sinks don’t come with built-in cabinets that sometimes turn into junk drawers.
This encourages a more minimalist approach, which can be refreshing in a smaller space.
So, are you convinced yet? If you’re nodding your head—heck, even if you’re just curious—stick around, because we’re about to lay out The “How to Attach a Pedestal Sink: Step-by-Step Guide” in epic detail.
Tools and Materials You’ll Need
Look, you wouldn’t whip up a gourmet meal without the right ingredients, right? The same logic applies to installing a pedestal sink. Gather these essentials before you start, and your future self will thank you:
Pedestal Sink (Basin + Pedestal)
Make sure the model fits your bathroom’s layout and plumbing configuration.
Measuring Tape
Because guesswork is overrated. You’ll want precise measurements for mounting heights and plumbing locations.
Adjustable Wrench
Essential for tightening plumbing connections.
Pipe Wrench
Useful for removing old fixtures or dealing with stubborn nuts.
Level
Ever seen a crooked sink? It’s not pretty, so grab a level to ensure everything stays nice and even.
Drill
You’ll need this for making pilot holes in the wall (particularly if you’re dealing with tile).
Screwdriver (Phillips and Flathead)
A standard for any install job.
Plumber’s Putty or Silicone Caulk
To seal gaps around the drain and keep water from sneaking under your sink.
Supply Lines and P-Trap
If you’re replacing an old sink, you might need new supply lines and a fresh P-trap that fits snugly under the new basin.
Mounting Bracket and Bolts
Typically included with the sink, but double-check you have everything you need.
Eye Protection and Gloves
Safety first, folks! You never know when a rogue chip of tile or metal might decide to go flying.
How to Attach a Pedestal Sink: Step-by-Step Guide
This is the moment you’ve been waiting for—the official “How to Attach a Pedestal Sink: Step-by-Step Guide.” Let’s jump right in and walk through the entire process from start to finish.
Step 1: Turn Off the Water Supply
There’s nothing worse than starting a plumbing project only to realize you forgot to shut off the water. So, locate the water shut-off valves—usually found underneath the sink or near the main supply line—and turn them off. Test the faucet to make sure the water’s no longer flowing. If water still trickles out, you might need to shut off the main valve for the entire house.
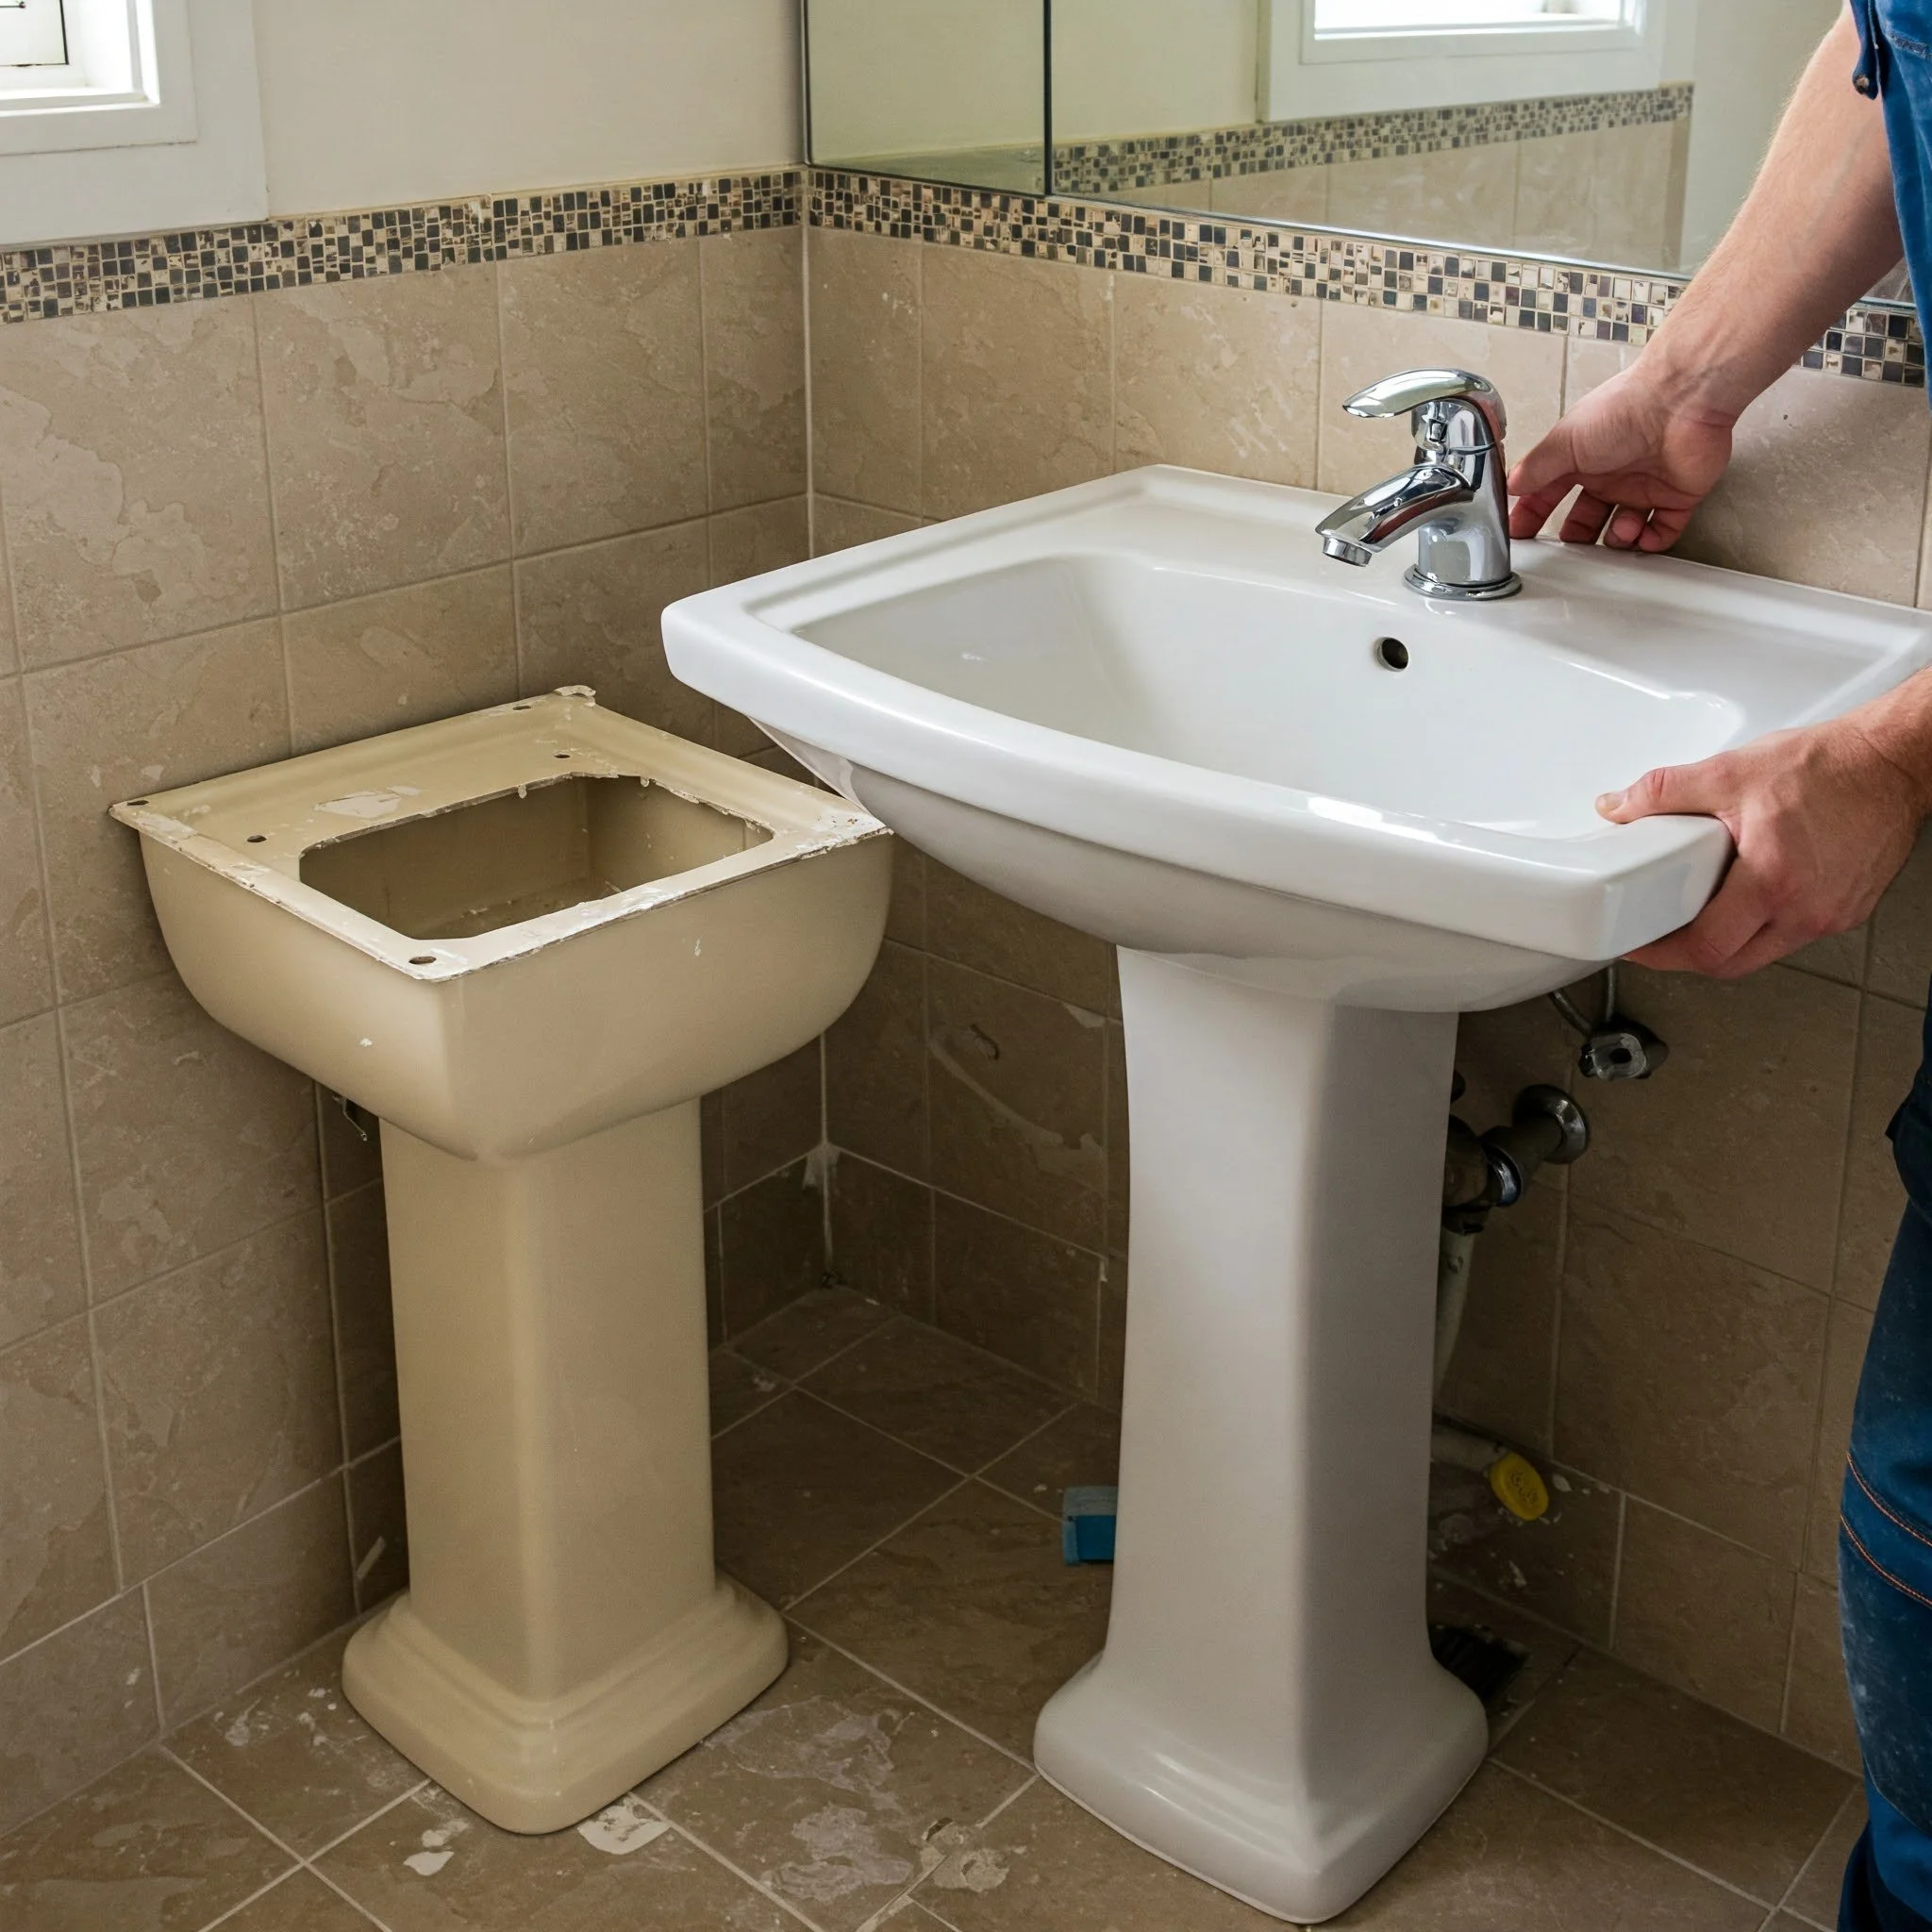
Step 2: Remove the Old Sink (If Applicable)
Got an older vanity or a sink that’s about as useful as a chocolate teapot? Time to bid it farewell. Carefully remove the existing sink by:
Disconnecting the supply lines.
Loosening the P-trap (have a bucket ready to catch any residual water).
Unscrewing any mounting brackets that hold the sink to the wall or countertop.
Be gentle, especially if the sink is attached with silicone caulk—you can use a utility knife to slice through the seal. Once it’s free, take the old sink out and clear the area.
Step 3: Prep the Wall and Floor
Pedestal sinks are all about that sweet synergy between the basin, the pedestal, and the wall behind it. Make sure:
The wall is sturdy (particularly where the sink will be anchored).
Any holes or damaged drywall are patched and sanded before proceeding.
The floor beneath the pedestal is level (or as close to level as possible).
If you’re renovating a vintage home where the walls aren’t exactly plumb, brace yourself—some creative adjustments might be necessary.
Step 4: Measure and Mark for Mounting Bracket
Grab that measuring tape and level:
Mark the Height:
Check the recommended mounting height in your sink’s manual. Typically, the top of the sink basin sits about 32–36 inches from the floor.
Use a pencil to mark the spot on the wall.
Locate the Studs:
If your pedestal sink kit has a mounting bracket, it’s crucial that at least one screw goes into a wall stud for robust support.
Use a stud finder to locate the stud’s edges. Mark ‘em for reference.
Level It Out:
Place the bracket on your pencil line and use a level to confirm it’s perfectly horizontal.
Mark the holes for drilling.
Step 5: Drill Holes and Install the Mounting Bracket
Got your marks ready? Time to drill:
Drill Pilot Holes:
Make holes in the wall where you’ve marked. If you’re drilling into tile, use a ceramic or masonry bit. Go slow—tile can crack if you rush it!Insert Anchors (If Needed):
If your bracket doesn’t align with studs, you’ll need heavy-duty wall anchors rated for the sink’s weight.Attach the Bracket:
Screw in the mounting bracket using the hardware provided. Make sure it’s snug but don’t overtighten to the point of stripping the screws or damaging the wall.
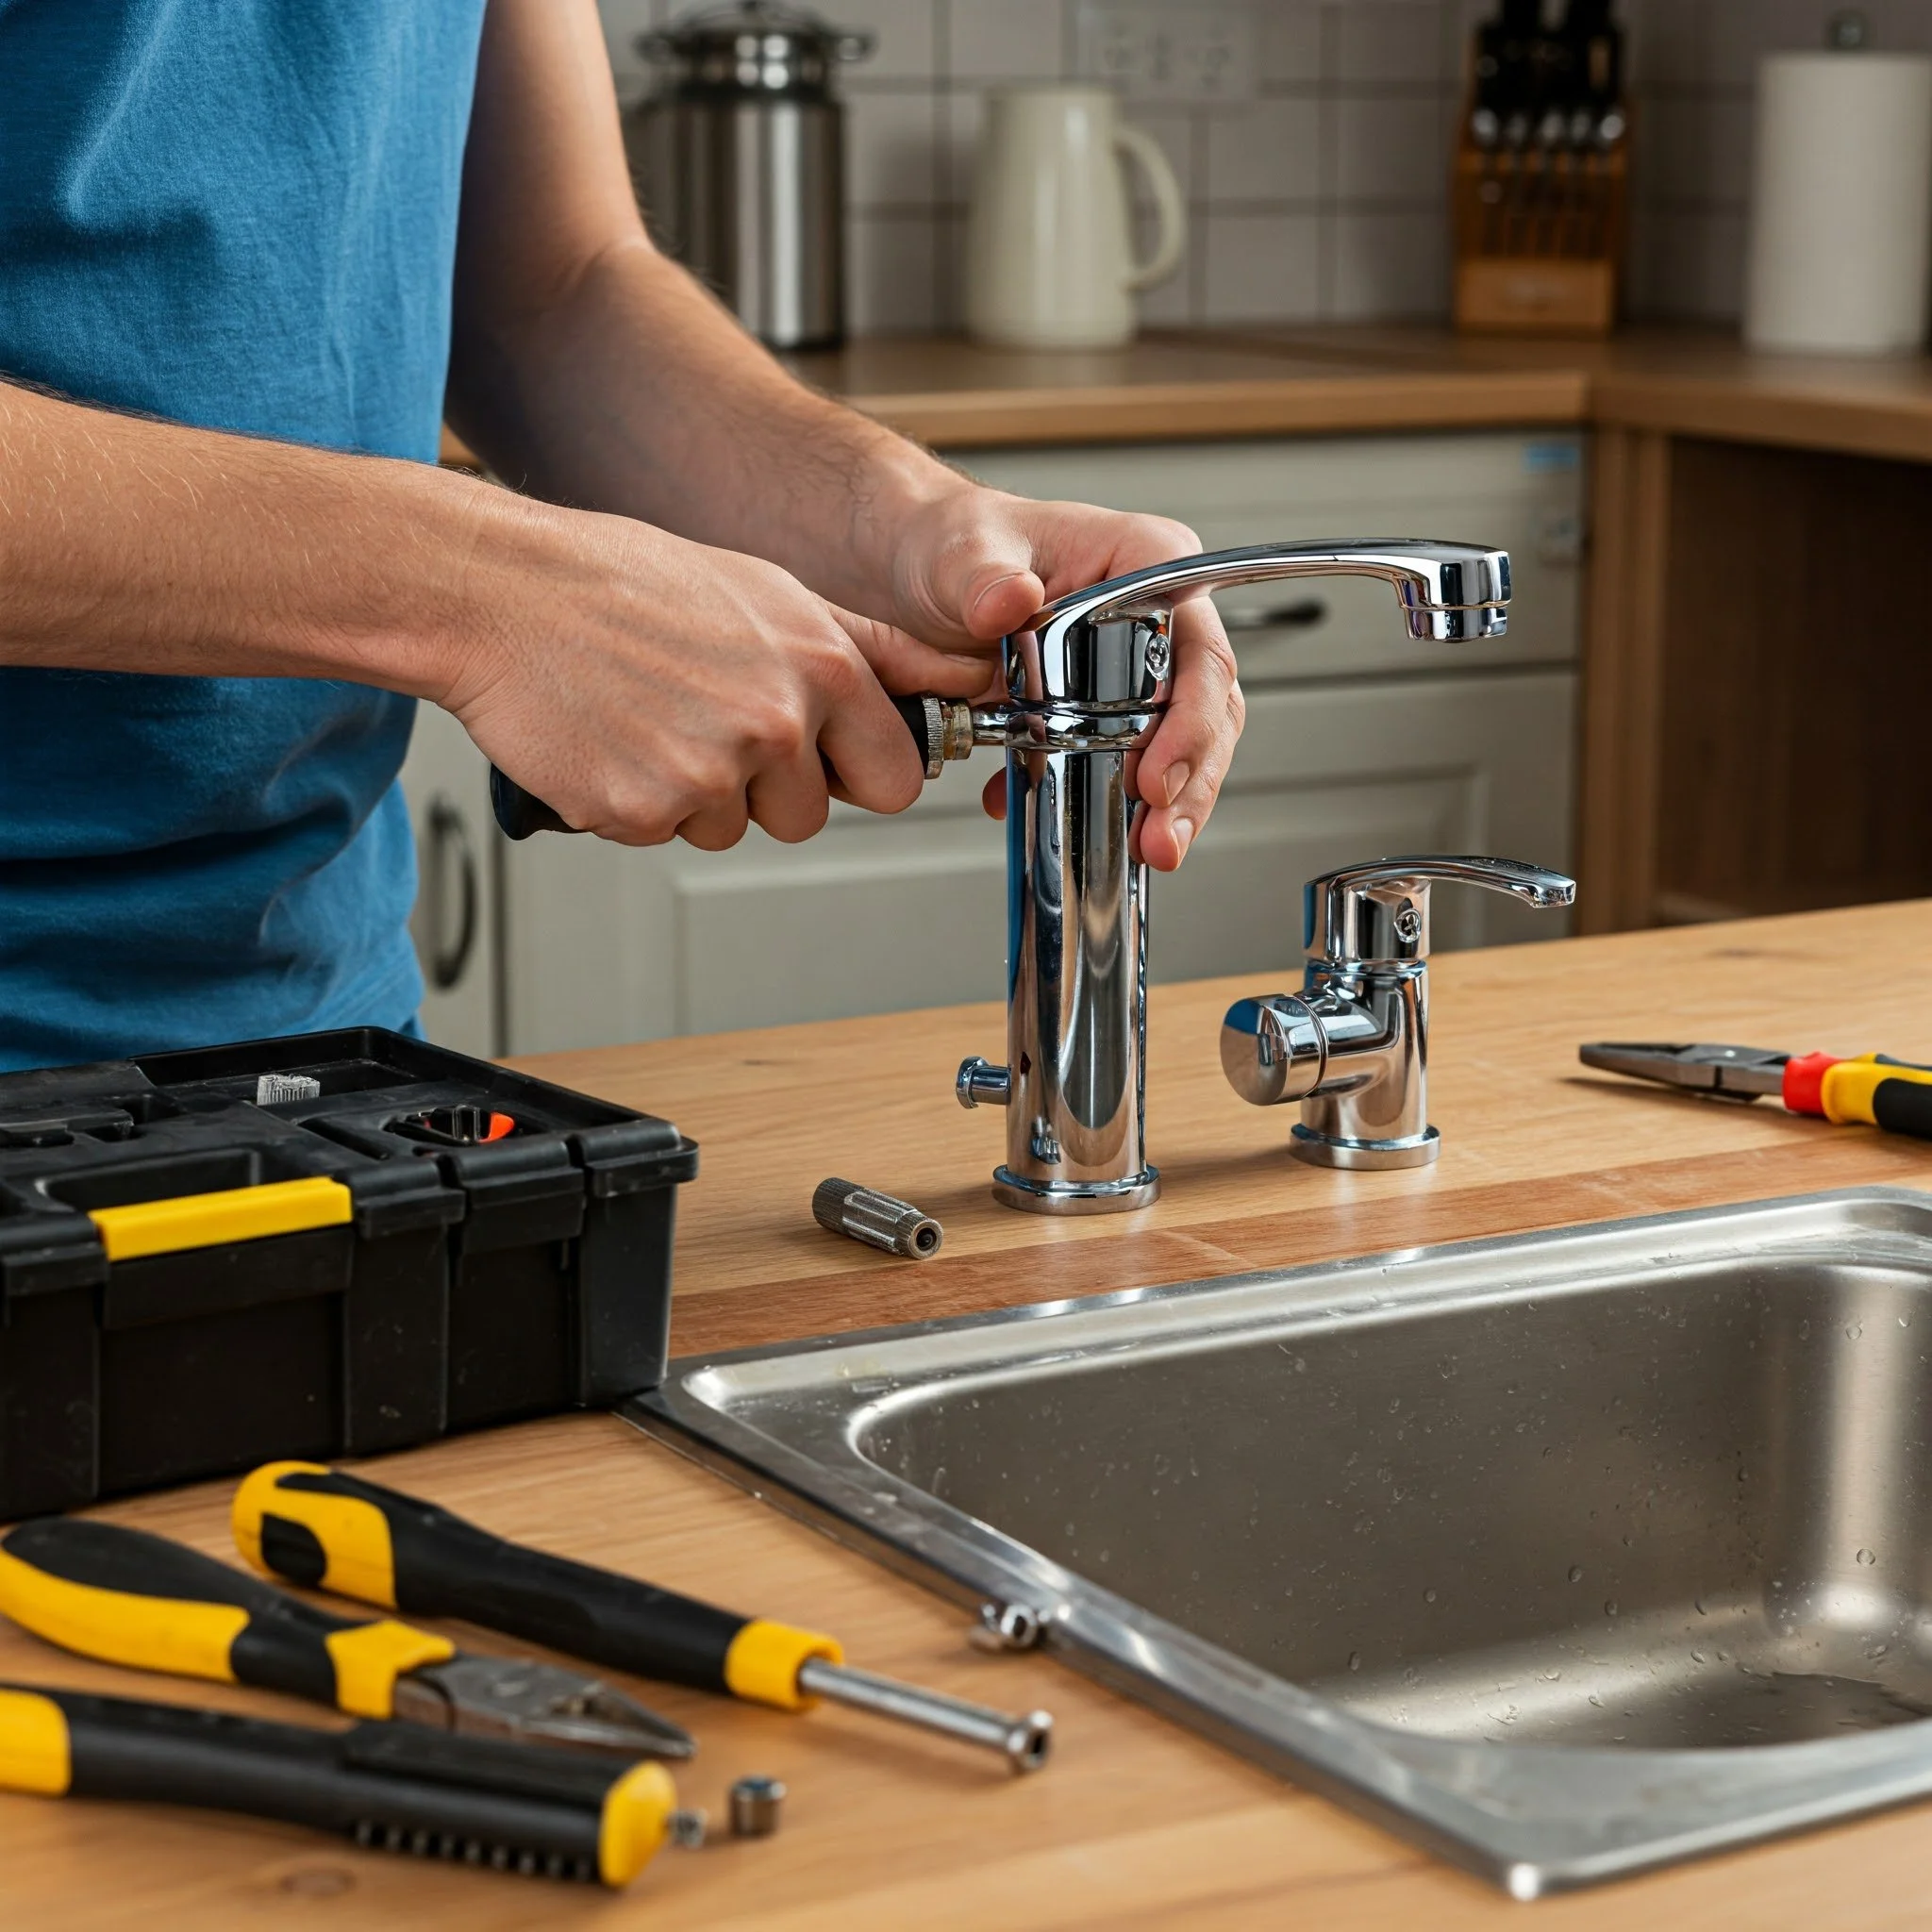
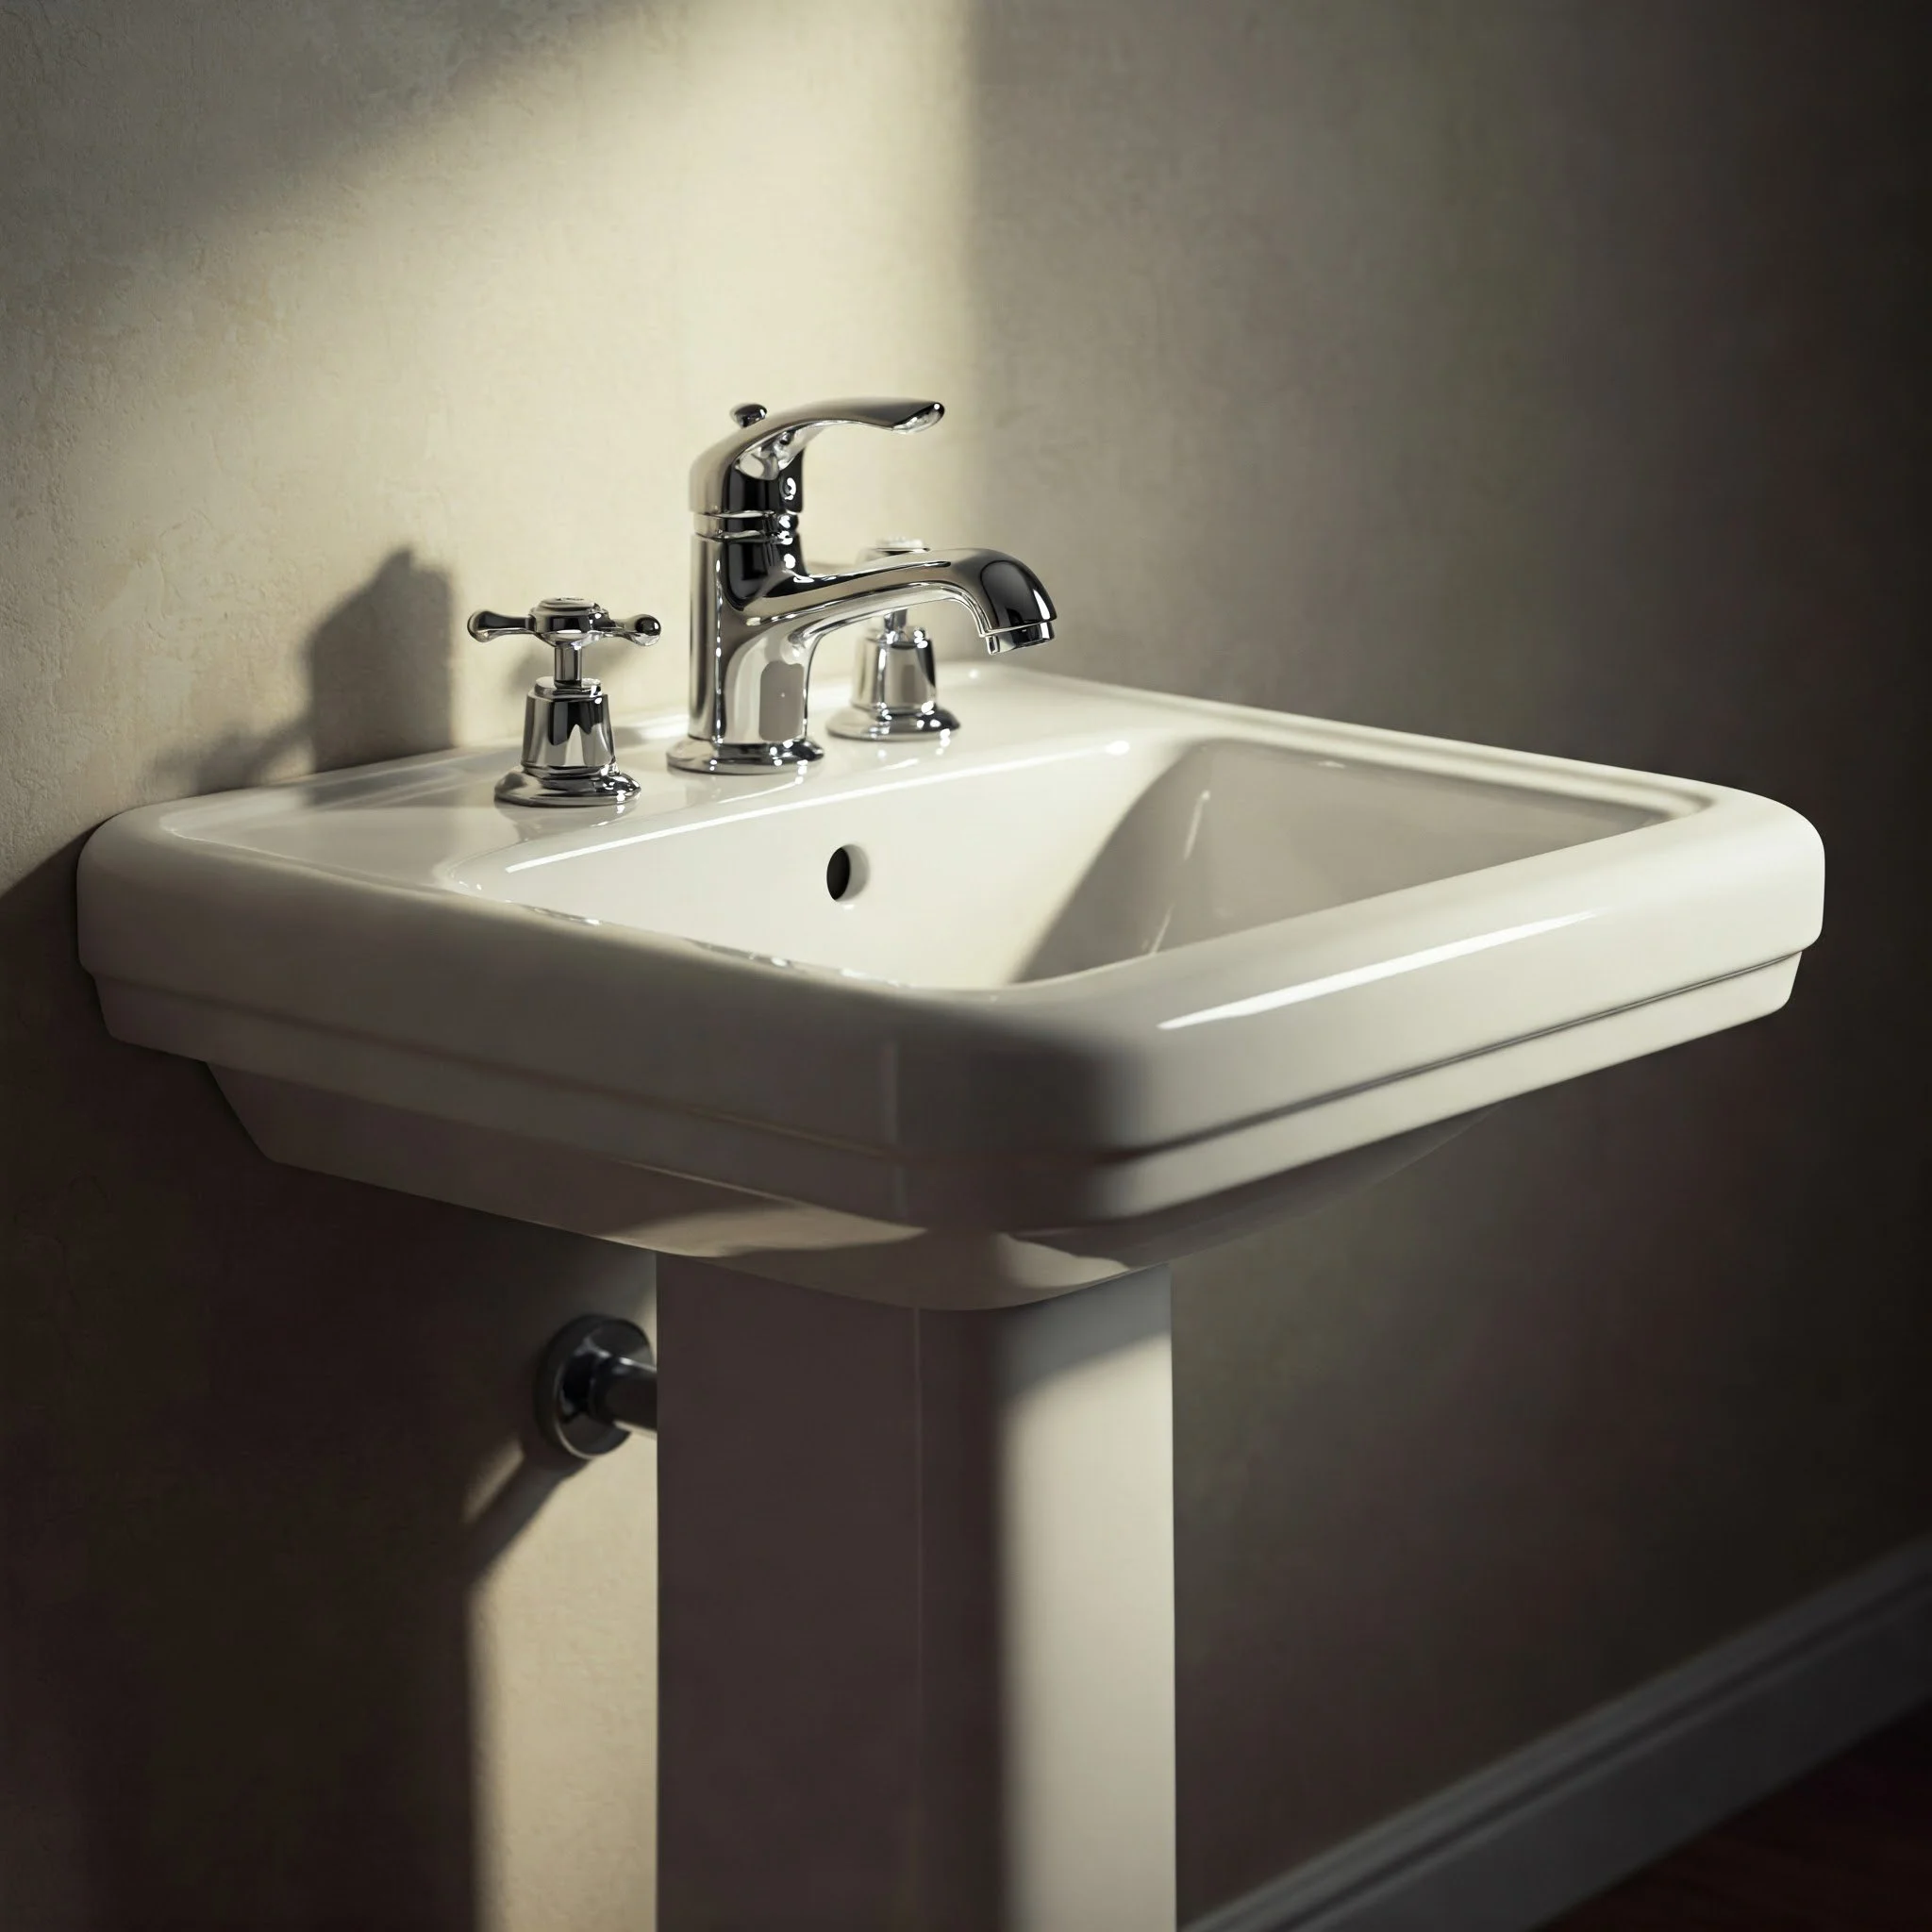
Step 6: Place the Pedestal and Basin
Now comes the fun part—actually setting the sink in place:
Position the Pedestal:
Gently place the pedestal where you’d like it to go.
Align the center of the pedestal with the drainpipe and the supply lines.
Set the Basin on Top
Carefully position the sink basin on the bracket, ensuring the basin’s mounting holes line up with the bracket’s bolts.
Check if the sink rests firmly on the pedestal. Adjust the pedestal slightly if needed.
Check for Level Again:
Use your level on the sink’s rim. If it’s tilted, adjust the pedestal until everything’s even.
Minor tweaks can prevent water from pooling on one side of the sink.
Step 7: Fasten the Sink Basin
Once it’s level:
Secure the Basin:
Slip the washers and nuts onto the bracket’s bolts behind the sink. Tighten them by hand first.
Then use a wrench to gently secure them. Don’t go overboard—overtightening can crack porcelain.
Attach the Pedestal:
In some sink models, the pedestal has a bolt hole that secures it to the floor. If so, mark the hole, set the sink aside, and drill accordingly. Insert a floor anchor, then fasten the pedestal once it’s back in place.
Step 8: Hook Up the Plumbing
Time to get this baby fully functional:
Install the Faucet and Drain:
It’s generally easier to mount the faucet and drain assembly before placing the sink on the pedestal, but you can do it now if you prefer.
Use plumber’s putty or silicone to seal the drain. Wipe away any excess.
Connect the Supply Lines:
Attach the hot and cold supply lines to the corresponding faucet valves.
Use an adjustable wrench to tighten the connections, but take care not to damage the valve stems.
Install the P-Trap:
Align the drain pipe with the sink’s tailpiece.
Fit the P-trap, ensuring a watertight connection.
If your drain lines don’t line up perfectly (which happens a lot in older homes), flexible drain kits can save your sanity.
Step 9: Test for Leaks
Moment of truth:
Turn the Water On:
Slowly open the shut-off valves. Check around the supply lines and faucet connections for any drips or leaks.
Let the water run for a minute, then inspect the P-trap and the drain assembly.
Tighten as Needed:
If you notice a tiny leak, gently tighten the nut or add more sealant.
Avoid the temptation to crank it too hard—you could damage the threads or crack the basin.
Step 10: Finishing Touches
You’re almost there!
Seal the Edges:
Apply a thin bead of silicone caulk around the top edge of the pedestal where it meets the basin.
Run a bead along the back of the sink where it meets the wall. This helps keep moisture from seeping behind the fixture.
Clean Up:
Wipe away stray marks, dust, or putty residue.
Tidy up your tools and admire your handiwork!
By following The “How to Attach a Pedestal Sink: Step-by-Step Guide,” you’ve accomplished a major feat. Bravo!
Troubleshooting Common Issues
Even with the best of intentions, sometimes things go sideways. Don’t panic; we’ve all been there. Here are a few hiccups you might encounter and how to fix them:
Leak Around the Drain:
Re-apply plumber’s putty or silicone. Make sure the gasket is aligned properly.
Wobbling Pedestal:
Check the floor level. Shim the pedestal base if needed.
Double-check that the mounting bracket is securely fastened to the wall.
Misaligned Supply Lines:
Use flexible water supply hoses if your existing pipes aren’t a perfect match for your new sink’s configuration.
Cracked Porcelain:
Unfortunately, if the sink or pedestal is cracked, you might need a replacement. Always handle these fixtures with caution—they’re more fragile than they look!
Tips for a Smooth DIY Experience
Want to speed up the process or dodge some headaches? Here are a few pointers:
Gather All Parts First
Double-check that your pedestal sink kit includes everything—mounting brackets, bolts, washers, etc. The last thing you want is a missing bracket when you’re halfway through the job.
Use a Helper
Pedestal sinks can be awkward to maneuver alone. Having someone hold the basin in place while you secure the bolts can save you from frustration (and potential backaches).
Dry Fit
Before drilling anything, do a “dry run” by placing the sink and pedestal in position to make sure everything lines up. You can catch alignment issues early this way.
Keep It Clean
Lay down towels or plastic sheets to protect your bathroom floor from scratches, debris, or water spills.
Take Pictures
If you’re removing an old sink, snap a few photos of the plumbing setup before disassembly. That reference can be super handy if you’re unsure how things go back together.
Another Look at How to Attach a Pedestal Sink: Step-by-Step Guide
Let’s do a quick recap. The “How to Attach a Pedestal Sink: Step-by-Step Guide” basically breaks down into a series of manageable tasks: turn off water, remove old sink, secure a mounting bracket, position the pedestal, fasten the basin, connect the plumbing, and finalize with a leak test. As intimidating as it might sound initially, once you see it spelled out in distinct steps, it’s not so bad—just a bit of mechanical and organizational finesse!
Remember, measure twice, drill once. Always confirm levels and alignment before permanently fixing anything. And don’t rush! Rushing is like texting while cooking—it usually ends in some sort of mess.
Conclusion
Congratulations! You’ve just tackled The “How to Attach a Pedestal Sink: Step-by-Step Guide,” and hopefully, you’re feeling like the DIY superhero you are. By upgrading to a pedestal sink, you’ve not only saved a chunk of change on professional installation but also breathed new life into your bathroom. Whether your style is modern-chic, vintage-inspired, or somewhere in between, a pedestal sink can offer that extra dash of elegance, making even the humblest powder room feel like a mini spa.
Now, all that’s left is to show it off! Invite some friends over, let them marvel at your handiwork, and maybe give yourself a well-earned pat on the back (and possibly a celebratory slice of pizza—just sayin’). If you run into any troubles or you’re craving more DIY inspiration, there’s a wealth of online videos, forums, and home-improvement communities brimming with ideas and solutions.
At the end of the day, installing a pedestal sink is more than just another chore—it’s a creative project that can truly transform your space. And once you see how simple it can be, you might just get the itch to tackle more home upgrades. After all, if you can handle “How to Attach a Pedestal Sink: Step-by-Step Guide,” what’s stopping you from your next renovation adventure?
Stay curious, keep learning, and most importantly—happy DIY-ing!
Frequently Asked Questions
Q1: Do I need special plumbing skills to install a pedestal sink?
A1: Not necessarily! If you’re comfortable turning off the water supply and following instructions carefully, you can handle it. Just take your time, read the manufacturer’s manual, and watch a tutorial or two if you’re feeling unsure.
Q2: Can I install a pedestal sink if my bathroom floor is uneven?
A2: You bet. You may need to use shims or adjustable mounts to ensure the sink is level. Pedestal sinks rely on the pedestal for support, so a steady foundation is crucial.
Q3: Is it possible to reuse my old faucet and drain assembly?
A3: Yes, as long as they’re in good condition and compatible with the new sink’s configuration. Give them a thorough cleaning (and perhaps a new coat of plumber’s tape) before re-installation.
Q4: Why is there so much emphasis on hitting a stud in the wall?
A4: Pedestal sinks can be pretty heavy, especially once the basin is filled with water. Mounting the bracket into a stud ensures the sink won’t come crashing down if someone leans on it.
Q5: What if I can’t find a stud where the sink needs to be mounted?
A5: In that scenario, heavy-duty wall anchors or toggle bolts can provide extra support. Always check the sink’s weight rating and the anchor’s capacity to avoid future mishaps.
Stay up to date with our latest ideas!