How to Fix a Leaky Bathtub Faucet: A Step-by-Step Guide
Struggling with a leaky bathtub faucet? Learn how to fix a leaky bathtub faucet with this comprehensive, easy-to-follow guide. Save water, money, and your sanity!

A leaky bathtub faucet can be more than just a minor annoyance—it can be a real pain in the neck! That constant drip, drip, drip not only drives you up the wall but also wastes a significant amount of water, which can add up on your utility bill. But don't fret! Fixing a leaky faucet is easier than you might think, and with a few tools and some patience, you can have your faucet working like new again.
So, let’s roll up our sleeves and dive into how to fix a leaky bathtub faucet—step by step. By the end of this guide, you'll have the knowledge and confidence to tackle this common household problem all on your own.
Understanding the Cause of the Leak
Before you jump into fixing the leak, it's essential to understand what’s causing it. Most of the time, the culprit is a worn-out washer, O-ring, or valve seat. But, depending on the type of faucet, the issue could stem from a few other places.
Types of Bathtub Faucets
There are generally four types of bathtub faucets:
Compression Valve Faucets: These are the most common and usually have separate hot and cold handles.
Ball-Type Faucets: These have a single handle that controls both the temperature and flow.
Cartridge Faucets: Similar to ball-type but use a cartridge to regulate water flow and temperature.
Ceramic Disc Faucets: These are the most durable and use a pair of ceramic discs to control the water flow.
Knowing what type of faucet you have will help you determine the exact cause of the leak and the best way to fix it.
Common Causes of Leaky Faucets
Worn-out Washers: These are common in compression faucets where the rubber washers wear out due to friction.
Damaged O-Rings: These are small rubber rings that seal the cartridge in cartridge faucets.
Corroded Valve Seat: The valve seat connects the faucet to the spout. Over time, it can corrode, causing leaks.
Loose Parts: Any of the above-mentioned parts can become loose over time, leading to leaks.
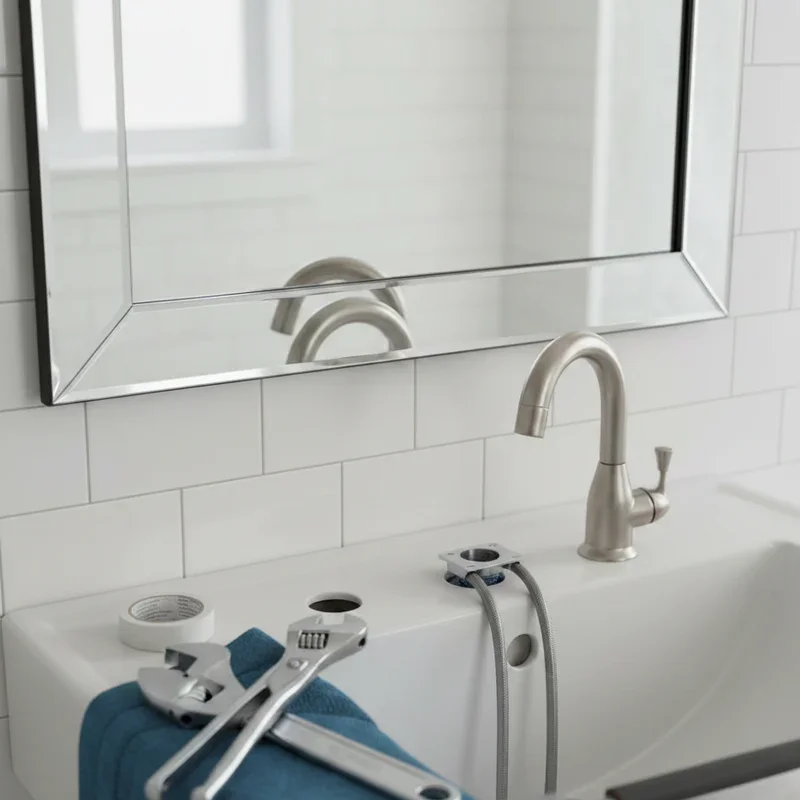
Tools and Materials You’ll Need
Before diving into the actual repair process, gather the necessary tools and materials. Nothing's worse than starting a job only to realize you're missing a crucial tool halfway through!
Essential Tools
Screwdrivers (Flathead and Phillips)
Adjustable wrench
Faucet handle puller (optional but helpful)
Plumber’s grease
Replacement parts (washers, O-rings, etc.)
Teflon tape
Materials
Cleaning cloth
White vinegar (for cleaning any built-up gunk)
Bowl (to catch any loose parts)

Step-by-Step Guide to Fixing a Leaky Bathtub Faucet
Ready to get your hands dirty? Let’s go through the process step by step.
Step 1: Turn Off the Water Supply
Before you start, the first crucial step is to turn off the water supply to prevent a potential mini flood in your bathroom. The shut-off valve is typically located under the sink or in the basement, but if you're unable to find it, you may need to turn off the main water supply to the house. Ensuring the water is completely off before you begin any repairs is essential to avoid water damage and make the process smoother and safer.
Step 2: Remove the Faucet Handle
Next, take a screwdriver to remove the handle’s screw, which is usually concealed under a decorative cap. Carefully pry off the cap to access the screw. Once the screw is removed, gently pull the handle off. If the handle is stubborn and doesn’t come off easily, a faucet handle puller can help. This tool provides extra leverage, making it easier to detach the handle without causing damage, ensuring a smooth process as you proceed with the repair.
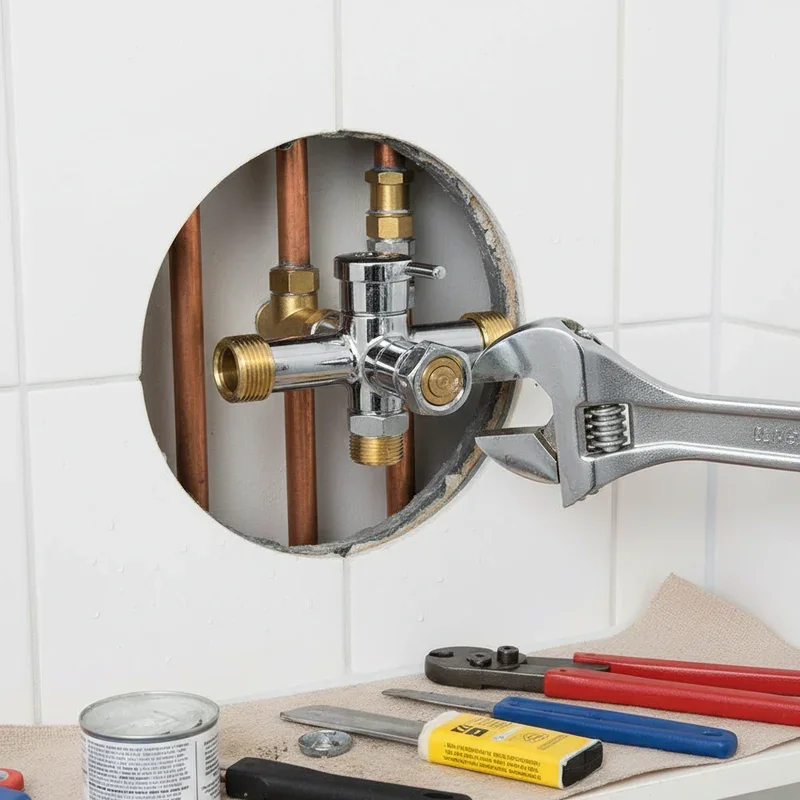
Step 3: Take Out the Cartridge or Valve Stem
Depending on the faucet type, you'll need to remove either a cartridge or a valve stem. Start by using an adjustable wrench to carefully unscrew the packing nut that secures the component. Once the nut is loosened, gently pull out the cartridge or valve stem. Be cautious during this process to avoid damaging the parts, as proper removal is crucial for a successful repair or replacement. This step is key in accessing the internal mechanisms of the faucet.
Step 4: Inspect the Parts
With the faucet disassembled, it's time to inspect the individual parts. Carefully examine the washers, O-rings, and valve seat for any signs of wear, damage, or corrosion. Worn-out washers or damaged O-rings can lead to leaks, while a corroded valve seat may cause further issues. If any parts appear deteriorated or faulty, replace them with new ones to ensure a proper seal and restore the faucet’s functionality, preventing future leaks or problems.
Step 5: Replace the Worn Parts
If the washer, O-ring, or valve seat is damaged, replace it with a new one that matches the exact size and type for your faucet. Ensuring a proper fit is crucial for effective repair. Before installing the new parts, apply plumber’s grease to each piece to promote a good seal and ensure smooth operation. This step helps prevent leaks and makes future maintenance easier, ultimately extending the life of your faucet and improving its performance.
Step 6: Reassemble the Faucet
After installing the new parts, reassemble the faucet by carefully reversing the disassembly steps. Align each component correctly, and be cautious not to overtighten any screws or nuts, as this can cause damage to the threads or deform the parts. Properly tightening ensures a secure fit without risking harm to the faucet. Once reassembled, test the faucet to ensure everything is functioning smoothly, confirming that the repairs were successful and that there are no leaks.
Step 7: Turn the Water Back On
With the faucet reassembled, turn the water supply back on and carefully check for any leaks. Run the water to ensure everything functions properly. If you notice any leaks, you may need to disassemble the faucet again to verify that all parts are seated correctly and securely. Double-check the alignment and tightness of the components to ensure a proper seal. Once everything is in place and leak-free, your repair is complete, and your faucet should be working perfectly.

Troubleshooting Common Issues
Even with careful work, sometimes things don’t go as planned. Here are a few common issues you might encounter and how to fix them.
The Faucet Is Still Leaking
If the faucet continues to leak after replacing the washers, O-rings, or valve seats, it could indicate that the parts weren’t installed correctly or that the valve seat is too corroded to function properly. Double-check your work to ensure all components are properly seated and tightened. If the leak persists despite your efforts, it may be time to consider replacing the entire faucet. This step ensures a long-term solution, preventing ongoing issues and restoring full functionality to your bathroom fixture.
The Handle Is Stuck
If the handle won’t budge even after removing the screw, avoid forcing it, as this can cause damage. Instead, try using a handle puller, which provides extra leverage to gently detach the handle. If that doesn’t work, apply a few drops of penetrating oil to the handle’s base and let it sit for a few minutes. This can help loosen any adhesive or rust that may be causing the handle to stick, making it easier to remove without damaging the faucet.
Water Pressure Is Low After the Repair
If you notice a drop in water pressure after fixing the faucet, it may be due to debris lodged in the valve or aerator. To address this, thoroughly clean both parts to remove any blockages or buildup. Inspect the aerator and valve for any obstructions that could be affecting water flow. Ensuring these components are clear will help restore proper water pressure and functionality to your faucet, ensuring it operates efficiently after the repair.

FAQs
How long should it take to fix a leaky bathtub faucet?
Fixing a leaky bathtub faucet typically takes between 30 minutes to an hour, depending on your experience and the type of faucet.
Do I need any special tools to fix a leaky bathtub faucet?
While most basic tools like screwdrivers and wrenches will do the job, a faucet handle puller and plumber’s grease can make the process easier.
Can I fix a leaky bathtub faucet myself, or should I hire a professional?
Most people can handle fixing a leaky faucet on their own, especially with this guide. However, if you're uncomfortable with DIY repairs or if the leak persists after attempting the fix, it's best to call a plumber.
Conclusion
Fixing a leaky bathtub faucet is a straightforward DIY task that can save you a lot of money on your water bill. With a little patience and the right tools, you can tackle this job like a pro. Plus, you'll get the satisfaction of knowing you fixed it yourself! So next time you hear that drip, drip, drip, you’ll know exactly what to do.
Remember, the key to a successful repair is understanding the cause of the leak, using the right parts, and taking your time during the repair process. Good luck, and happy fixing!
Stay up to date with our latest ideas!