GFCI Outlet Wiring: What’s Line and What’s Load?
Confused about GFCI outlet wiring? Learn about the difference between line and load connections, how to wire GFCIs correctly, and why it matters. Get practical insights and troubleshooting tips in this detailed guide.
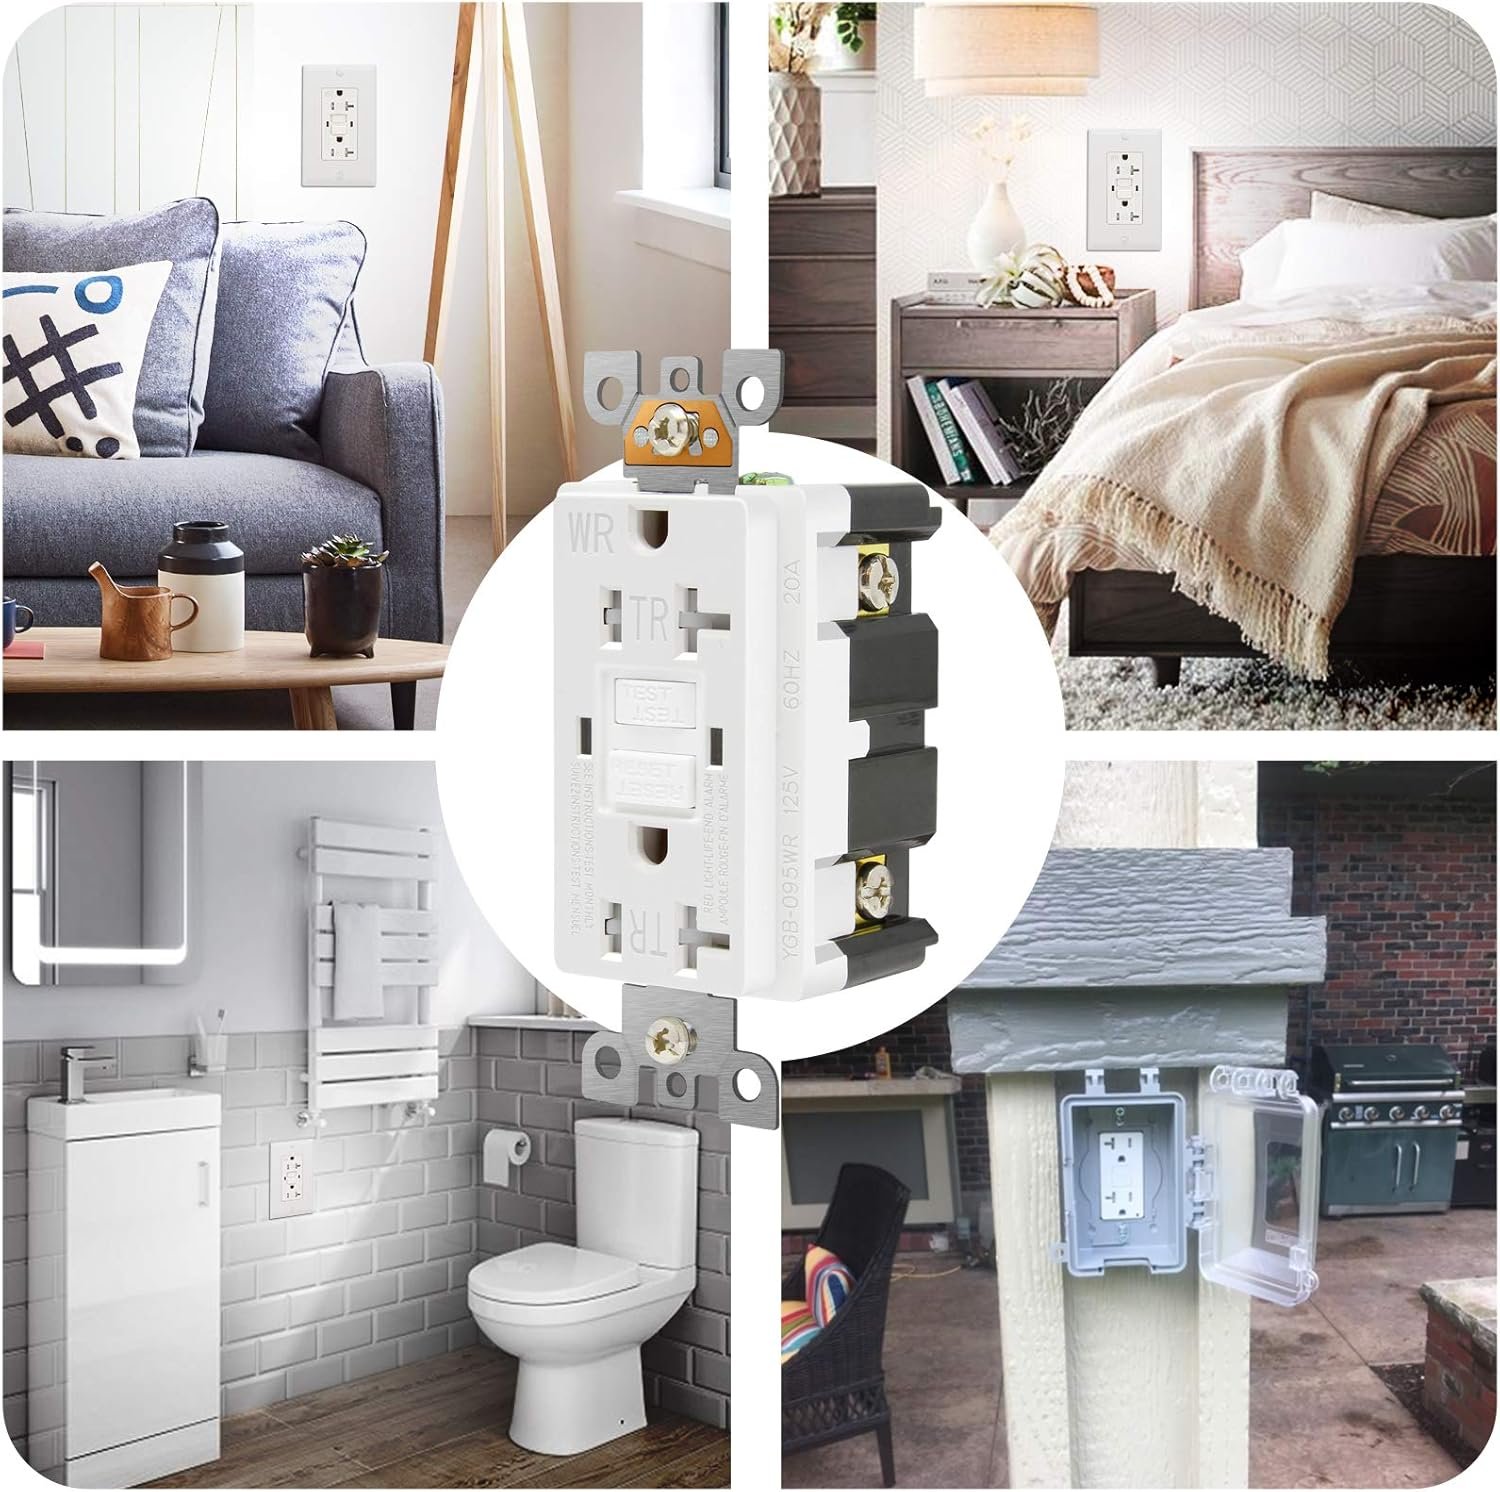
Image: Amazon
GFCI outlets are a vital part of electrical safety in homes and workplaces. They prevent electrical shocks by quickly shutting off power when they detect a ground fault or any unexpected voltage irregularities. But if you’re diving into the world of electrical work, you may have heard some confusing terminology when it comes to wiring these outlets. What’s the deal with “line” and “load”?
In this article, we’ll walk through GFCI outlet wiring: what’s line and what’s load? You'll learn how to distinguish between the two, why the distinction matters, and how getting it right can protect your home and everyone in it from electrical hazards. Ready to get started? Let’s dive in.
What is a GFCI Outlet and Why Do You Need One?
Before we dig into the wiring details, let’s quickly review what a GFCI outlet is and why it’s crucial to have one installed in certain parts of your home.
What is a GFCI Outlet?
A Ground Fault Circuit Interrupter (GFCI) outlet is designed to prevent electrical shock. It’s equipped with technology that can detect even the smallest difference between the hot and neutral wires. If there’s an imbalance — even as small as 4-6 milliamps — the GFCI shuts off the power within milliseconds to prevent potential harm.
These outlets are typically installed in areas where there’s a higher risk of electrical shock due to moisture, like:
Bathrooms
Kitchens
Laundry rooms
Outdoors (near pools, hot tubs, etc.)
Garages
Why Should You Use GFCIs?
While standard outlets are safe for most situations, a GFCI is an absolute must in locations where electrical equipment may come in contact with water. Without one, a person could suffer severe electrical shock or even death if they come into contact with faulty wiring or an appliance while wet.
Now that we’ve covered the basics of GFCI outlets, let’s turn our attention to the wiring aspect, specifically, understanding what’s line and what’s load.
GFCI Outlet Wiring: What’s Line and What’s Load?
When you’re installing or replacing a GFCI outlet, understanding the difference between “line” and “load” is essential. Simply put, these terms refer to where the power comes from (the line) and where it goes (the load).
What Does “Line” Mean in GFCI Wiring?
In GFCI outlet wiring, the term "line" refers to the incoming power supply, which is essential for the outlet's operation. The line terminals are where the electricity enters the outlet and provides power to the circuit. These terminals are usually marked with black (hot) and white (neutral) screws, clearly indicating where to connect the corresponding wires. It’s important to connect the correct wires to these line terminals, as they provide the initial power that flows through the GFCI outlet. Without the proper connection at the line terminals, the outlet won’t function correctly, and downstream outlets won’t receive the necessary protection. Properly wiring the line terminals is crucial for ensuring the safety and reliability of the entire circuit.
Why is the Line Important?
The line connection plays a critical role in ensuring the proper operation of a GFCI outlet. If the line terminals are wired incorrectly, the outlet won’t receive power, which means it won't function to protect against electrical faults. The line screws are where the black (hot) and white (neutral) wires should be attached. The black wire connects to the hot terminal, while the white wire connects to the neutral terminal. These line connections bring electricity into the GFCI outlet, enabling it to power the circuit and detect ground faults. If these connections are not made correctly, the outlet will not provide protection, and the GFCI will fail to reset or trip in response to faults. Properly wiring the line is essential for safety.
What Does “Load” Mean in GFCI Wiring?
On the other hand, the load terminals are crucial for protecting the rest of the circuit downstream from the GFCI outlet. These terminals are where you connect the black (hot) and white (neutral) wires that lead to additional outlets or devices further along the circuit. By wiring the load terminals properly, the GFCI ensures that any outlets or appliances connected downstream receive the same protection from electrical faults as the GFCI outlet itself. This is particularly important if you have multiple outlets on the same circuit, as the GFCI will monitor and protect all of them from ground faults. Properly connecting the load terminals guarantees that the safety features of the GFCI extend beyond just the outlet itself to safeguard the entire circuit.
Why is the Load Important?
The load side is responsible for sending electricity downstream to other outlets or devices. By connecting the load wires correctly, you're ensuring that any appliance or outlet downstream gets the same protection from electrical faults as the GFCI outlet itself.
Load screws: Black (hot) and white (neutral) wires leading to the next outlet or appliance.
Purpose: To send protected power to other outlets downstream.
How to Properly Wire a GFCI Outlet: A Step-by-Step Guide
Now that we’ve broken down the basics, let’s dive into the nitty-gritty of how to wire a GFCI outlet correctly. While it may seem intimidating at first, following the steps outlined below can ensure your installation is safe and efficient.
Tools You’ll Need
Before you begin, make sure you have these tools on hand:
Screwdriver
Wire stripper
Electrical tester
Pliers
Voltage detector
Electrical tape
Step-by-Step GFCI Wiring Instructions
Turn off the Power: Before starting any electrical work, safety is the top priority. Always begin by turning off the circuit breaker that supplies power to the outlet you’ll be working on. This step is crucial to avoid any risk of electrical shock. Once the breaker is off, it’s essential to double-check that no power is still running to the outlet. To do this, use a voltage tester or a non-contact voltage detector to ensure the wires are completely de-energized. Don’t skip this step! Even if the breaker is off, it’s always a good idea to verify that there’s no live electricity left in the wires. This extra precaution ensures you can safely work without any electrical hazards.
Remove the Existing Outlet: If you’re replacing an old outlet, the next step is to remove the existing one from the electrical box. Start by using a screwdriver to loosen and remove the screws securing the outlet to the box. Be sure to handle the screws carefully so you don’t damage them, as they’ll be useful for the new installation. Once the screws are removed, gently pull the outlet out from the box, but take care not to tug on the wires too harshly. You might need to slightly wiggle the outlet to break it free from the box. This step is crucial for accessing the wiring, allowing you to disconnect the old outlet and prepare the space for the new one. Always take extra caution when handling wires.
Identify the Line and Load Terminals: When installing a new GFCI outlet, it's essential to identify the correct terminals for wiring. Look for the labels “line” and “load” on the outlet to ensure you connect the wires properly. The line terminals are where the power comes into the outlet, so these should be connected to the incoming hot (black) and neutral (white) wires. The load terminals, on the other hand, are responsible for sending power to downstream outlets or devices that will also be protected by the GFCI. Double-check these labels carefully before wiring to avoid any confusion. Connecting the wrong wires to the wrong terminals can prevent the GFCI from working properly, compromising both functionality and safety. Take your time and get it right.
Prepare the Wires: Before connecting the wires to the GFCI outlet, you’ll need to prepare them by stripping a small section of insulation. Use a wire stripper to remove about 3/4 inch of the outer coating from each wire. This is essential for creating a secure, reliable connection with the outlet terminals. Make sure to strip just enough insulation to expose the copper wire without damaging or nicking it, as this could lead to poor contact or electrical issues. If you strip too much, it could expose extra wire, which might create a short circuit. A clean, precise strip ensures that the wires will fit snugly into the terminals and maintain a strong electrical connection, ultimately enhancing the outlet’s performance and safety.
Connect the Line Wires: When connecting the line wires to your GFCI outlet, start with the black (hot) wire. Attach this wire to the line screw labeled "line" on the outlet. This terminal is where the incoming power enters the GFCI. Make sure the wire is securely wrapped around the screw in a clockwise direction, allowing for a tight connection. Next, take the white (neutral) wire and attach it to the other line screw, which is usually marked or labeled as "line" as well. Again, ensure that the wire is wrapped properly around the screw and tightened securely. A good connection at the line terminals is crucial for the GFCI outlet to function correctly, as it ensures proper power flow into the device.
Connect the Load Wires: When connecting the line wires to your GFCI outlet, start with the black (hot) wire. Attach this wire to the line screw labeled "line" on the outlet. This terminal is where the incoming power enters the GFCI. Make sure the wire is securely wrapped around the screw in a clockwise direction, allowing for a tight connection. Next, take the white (neutral) wire and attach it to the other line screw, which is usually marked or labeled as "line" as well. Again, ensure that the wire is wrapped properly around the screw and tightened securely. A good connection at the line terminals is crucial for the GFCI outlet to function correctly, as it ensures proper power flow into the device.
Secure the Wires: Once the wires are connected to the appropriate terminals, it's time to secure them. Begin by tightening the screws on all the terminals—both the line and load screws—using a screwdriver. Make sure the wires are firmly in place and that the screws are tight enough to hold them securely. However, avoid overtightening the screws, as this can cause damage to the wires or even break the connection. The goal is to ensure a solid, reliable contact without putting excessive pressure on the wire strands. A well-secured connection is critical for the proper function of the GFCI outlet, as loose wires can lead to electrical malfunctions or even create a fire hazard. Double-check each terminal before moving on to the next step.
Install the Outlet: After ensuring that all the wires are securely attached to the terminals, it’s time to install the GFCI outlet into the electrical box. Gently push the wired outlet back into the box, making sure the wires don’t get pinched or twisted during the process. Take your time and ensure that the outlet is aligned properly within the box before securing it in place. Once the outlet is positioned correctly, use the screws provided to fasten it to the electrical box. Tighten the screws until the outlet is firmly held, but avoid overtightening, as this could crack the outlet or damage the box. A properly installed outlet ensures that the GFCI will function correctly and provide the necessary safety features.
Test the GFCI: Once the GFCI outlet is securely installed, it's time to test it to make sure everything is functioning as it should. Start by flipping the circuit breaker back on, restoring power to the outlet. Next, press the “reset” button on the GFCI outlet to initialize it. This should restore power to the outlet and activate its protective function. To further confirm that everything is working properly, use an electrical tester to check for power at the outlet. The tester will help ensure that the outlet is live and providing electricity. If the tester shows no power or the GFCI trips immediately, there may be a wiring issue, and you’ll need to troubleshoot the connections before proceeding.
Troubleshooting GFCI Outlet Wiring: Common Issues
Even if you follow the steps to the letter, there may still be some challenges. Here are a few common problems you might encounter during GFCI outlet wiring:
1. GFCI Outlet Won’t Reset
If your GFCI outlet won’t reset, it could indicate that the line and load terminals are wired incorrectly. This is a common mistake that can prevent the GFCI from functioning properly. The line terminals are meant to receive power from the incoming circuit, while the load terminals protect downstream outlets. If these wires are swapped, the GFCI won’t reset, as it won’t be able to detect the proper flow of electricity. To fix this, double-check that the black (hot) wire is connected to the line terminal and the white (neutral) wire to the corresponding line terminal. If you have downstream outlets connected, make sure the load wires are attached to the correct load terminals. Once the wires are properly connected, the GFCI should reset as expected.
2. Outlet Doesn’t Provide Power
Sometimes, it’s easy to overlook this step, so make sure the breaker is switched on. If the breaker is fine, the issue might lie in the wiring. Double-check that you’ve wired the line terminals correctly—the black (hot) wire should be connected to the line screw marked "line," and the white (neutral) wire should go to the corresponding line terminal. Another common problem is a loose connection. If any wire is not properly tightened, it can prevent the outlet from functioning. Gently tug on the wires to ensure they are securely attached. If all else fails, recheck the connections and tighten any loose screws.
3. GFCI Keeps Tripping
It’s a sign that there may be a wiring fault or a ground fault somewhere in the circuit. This could be due to incorrect wiring, such as reversed line and load connections, or a short circuit causing an imbalance in the electrical flow. To troubleshoot, first double-check your wiring to ensure everything is connected properly. If the wiring seems correct, use an electrical tester to check for any short circuits or ground faults in the system. A short circuit or other issues like a faulty appliance plugged into the GFCI could be the culprit. Isolating the problem with the tester can help you pinpoint the cause and prevent the GFCI from continually tripping.
Conclusion
GFCI outlet wiring: What’s line and what’s load? The answer to this question can make or break your electrical setup. By understanding the difference between line and load, you can ensure that your GFCI outlet is wired safely and effectively, protecting your home from electrical hazards.
When in doubt, always follow the wiring instructions carefully and remember that a GFCI outlet’s primary job is to protect you and your family from potential electrical shocks. Stay safe, and happy wiring!
Frequently Asked Questions
Q1: Can I wire a GFCI outlet if I'm not an electrician?
It’s best to have some experience with electrical wiring before attempting a GFCI installation. However, if you're comfortable with basic electrical tasks and follow safety protocols, it can be a DIY project.
Q2: What happens if I connect the line and load wires incorrectly?
If the line and load wires are reversed, the GFCI won’t function correctly and may not protect downstream outlets.
Q3: Can I install a GFCI outlet in place of a standard one?
Yes, you can replace a standard outlet with a GFCI outlet. Just make sure you wire it correctly, ensuring that the line and load connections are accurate.
Stay up to date with our latest ideas!