Learn How to Remove Wallpaper Glue Easily
Discover simple and effective techniques to remove wallpaper glue with ease. Our guide, "Learn How to Remove Wallpaper Glue Easily," offers expert tips for a smooth, clean finish.
So, you’ve decided it’s time for a fresh start and ripped down that dated wallpaper, only to find yourself faced with a sticky situation—literally. Removing wallpaper is one thing, but dealing with the leftover glue can be a whole new ball game. The good news? It doesn't have to be a nightmare. In this article, we’ll walk you through the steps to Learn How to Remove Wallpaper Glue Easily, turning a potentially frustrating task into a manageable one. Whether you're a DIY newbie or a seasoned home renovator, these tips will help you achieve a smooth, clean finish.
The Sticky Situation: Understanding Wallpaper Glue
Before diving into the removal process, it’s helpful to understand what you’re dealing with. Wallpaper glue, also known as adhesive or paste, is designed to hold wallpaper firmly in place. It’s typically water-based but can still be quite stubborn to remove, especially if it’s been there for years. The key to learning how to remove wallpaper glue easily is patience and the right tools. Let’s get started!
Tools and Materials You'll Need
Before starting the task of removing sticky residue, it's important to gather all the necessary supplies. Here’s a list of essential tools and materials:
1. Warm Water
Purpose: Used as a base for cleaning solutions, warm water helps dissolve sticky substances more effectively than cold water.
2. Liquid Dish Soap or Vinegar
Liquid Dish Soap: A mild detergent that can break down oils and sticky residues without damaging most surfaces.
Vinegar: A natural cleaning agent, vinegar is effective in cutting through grease and sticky residues.
3. Sponge or Soft Cloth
Sponge: Use a non-abrasive sponge to avoid scratching surfaces.
Soft Cloth: A microfiber cloth is ideal for gently wiping and polishing surfaces after residue removal.
4. Bucket
Usage: Use a bucket to hold warm water and your cleaning solution, making it easy to dip your sponge or cloth as needed.
5. Scraper or Putty Knife
Purpose: A plastic scraper or putty knife can help gently lift off stubborn residue without scratching the surface.
6. Spray Bottle
Usage: Fill a spray bottle with a cleaning solution of warm water and dish soap or vinegar. This allows for easy application on the affected area.
7. Drop Cloths or Old Towels
Protection: Use drop cloths or old towels to protect the surrounding area from water or cleaning solution spills and to catch any removed residue.
8. Sandpaper (Optional)
Usage: For particularly tough, dried-on residue, fine-grit sandpaper can be used carefully to smooth the surface, especially on wood.
9. Gloves (Optional)
Protection: Wearing gloves can protect your hands from harsh chemicals and make cleaning more comfortable.
With these tools in hand, you’re ready to tackle that sticky residue! The process involves applying the cleaning solution, gently scrubbing or scraping the area, and then wiping it clean with a soft cloth. Always test a small, inconspicuous area first to ensure that the cleaning solution does not damage the surface.

Step-by-Step Guide: Learn How to Remove Wallpaper Glue Easily
1. Protect Your Space
Before you begin the task of removing sticky residue, it's important to protect your floors and furniture. Here’s how to prepare your space:
1. Lay Down Drop Cloths
Covering Floors: Use drop cloths or old towels to cover your floors. This helps catch any drips from cleaning solutions or debris from scraping off residue, protecting your floors from potential damage.
Area Coverage: Ensure the drop cloths extend beyond the immediate area where you’ll be working, as this provides extra protection against accidental spills or splashes.
2. Remove Obstacles
Move Furniture: Move furniture away from the walls or the area where you’ll be working. This not only protects the furniture but also gives you ample space to work without obstruction.
Cover Remaining Items: For items that cannot be moved, cover them with plastic sheeting, old towels, or drop cloths to protect them from water, cleaning solutions, and any adhesive residue that may fall off during the cleaning process.
Clear the Area: Remove any smaller items, such as decor or electronics, from the area to ensure they do not get damaged or obstruct your work.
Taking these precautionary steps will help keep your space clean and prevent any accidental damage to floors or furniture while removing sticky residue. It also allows you to work more efficiently and safely, knowing that your surroundings are protected.
2. Prepare Your Solution
A good cleaning solution is key to loosening the glue and making the removal process easier. Here are two effective solutions you can use:
1. Warm Water and Dish Soap
Mixing the Solution: In a bucket, mix warm water with a few drops of liquid dish soap. This gentle yet effective solution helps to break down oils and sticky substances.
Application: Use a sponge or soft cloth to apply the soapy water to the affected area. Let it sit for a few minutes to allow the solution to penetrate the residue, making it easier to wipe away.
Advantages: This solution is safe for most surfaces and is a great option for delicate materials or areas where you want to avoid using harsher chemicals.
2. Vinegar Solution
Mixing the Solution: Create a mixture of equal parts warm water and white vinegar. Vinegar is a natural adhesive remover and works wonders on stubborn glue and sticky residues.
Application: Apply the vinegar solution with a spray bottle or a cloth, saturating the sticky area. Allow it to sit for a few minutes to help break down the adhesive properties of the glue.
Advantages: The vinegar solution is effective for tougher, more resilient adhesives. It’s a natural, non-toxic option that’s safe for use on many surfaces.
Additional Tips:
Test a Small Area First: Before applying any cleaning solution, test it on a small, inconspicuous area to ensure it doesn’t damage or discolor the surface.
Repeat if Necessary: For particularly stubborn residue, you may need to repeat the application and scrubbing process a few times.
Rinse and Dry: After removing the residue, rinse the area with clean water to remove any remaining soap or vinegar, and dry it with a soft cloth to prevent water spots.
Using these solutions, you can effectively loosen and remove glue and sticky residues from various surfaces without causing damage.
3. Test a Small Area
Before you go full steam ahead, it’s wise to test your cleaning solution on a small, inconspicuous area to ensure it won't damage the surface. Here's how to do it:
1. Apply the Solution
Small Test Area: Choose a small, inconspicuous area, such as a hidden corner or behind furniture, where any potential damage won't be noticeable.
Application Method: Dip a sponge or cloth into your prepared cleaning solution (either the warm water and dish soap mix or the vinegar solution) and gently rub it on the test area.
Gentle Application: Apply the solution gently to avoid scratching or causing immediate damage. Allow the solution to sit for a minute or two, especially if you're using vinegar, to see if it reacts with the surface.
2. Check for Damage
Observe the Area: After a few minutes, carefully inspect the test area for any signs of damage, discoloration, or changes in texture. Look for any adverse reactions such as peeling, fading, or softening of the surface.
Surface Integrity: Ensure that the paint or wall surface remains intact and undamaged. If the surface shows no signs of harm, you can proceed with confidence to clean the larger area.
By performing this simple test, you can avoid potential damage to the paint or wall surface, ensuring that your cleaning solution is safe to use on the entire area. This step is particularly important when working with stronger cleaning agents or on surfaces with unknown or delicate finishes.
4. Soften the Glue
To effectively remove wallpaper glue, it's important to soften the glue before attempting to scrape it off. Here’s how to do it:
1. Spray the Wall
Solution Preparation: Fill a spray bottle with your chosen cleaning solution. You can use either the warm water and dish soap mixture or the vinegar solution, depending on what you have tested and found suitable.
Generous Application: Spray the glue-covered area generously, ensuring that the solution penetrates the glue thoroughly. A thorough soaking helps break down the adhesive properties of the glue, making it easier to remove.
2. Let It Sit
Waiting Period: Allow the solution to sit on the glue-covered area for about 10-15 minutes. This waiting period is crucial as it gives the solution time to penetrate and soften the glue.
Observation: Keep an eye on the area to ensure that the solution is adequately moistening the glue. If necessary, spray additional solution to keep the glue wet and ensure maximum softening.
By softening the wallpaper glue with your cleaning solution, you make the subsequent scraping process much easier and more efficient. This step reduces the risk of damaging the wall surface during glue removal.
5. Scrape Away the Glue
Once the glue has softened, it’s time to roll up your sleeves and get scraping. Here’s how to do it effectively:
1. Use a Scraper
Choosing a Tool: Use a scraper or putty knife to remove the softened glue. Choose a plastic or metal scraper, depending on the wall surface. Plastic scrapers are less likely to damage the wall, while metal ones may be necessary for more stubborn glue.
Scraping Technique: Hold the scraper at a slight angle, approximately 30 degrees, to avoid gouging or damaging the wall surface. Gently apply pressure as you scrape off the glue, using smooth, even strokes.
Gentle Approach: Start gently and increase pressure if needed. If you encounter resistance, reapply the solution and wait a bit longer before trying again.
2. Work in Sections
Small Areas: It’s best to work in small sections to prevent the glue from drying out before you can remove it. Spray the solution, wait for it to soften the glue, and then scrape it off. This approach ensures that the glue remains soft and easy to remove.
Consistent Application: As you finish one section, move on to the next by repeating the spraying and scraping process. This methodical approach helps manage the work and prevents missing any spots.
Check for Residue: After scraping each section, check for any remaining glue residue. You may need to repeat the process in some areas to ensure all the glue is removed.
Additional Tips:
Clean the Scraper: Frequently wipe off the glue build-up from the scraper to keep it effective.
Final Wipe Down: After all the glue has been removed, wipe down the wall with a damp cloth to remove any residual cleaning solution or glue particles.
By working systematically and carefully, you can effectively remove the wallpaper glue without damaging the wall. This preparation is crucial, especially if you plan to repaint or apply new wallpaper to the surface.
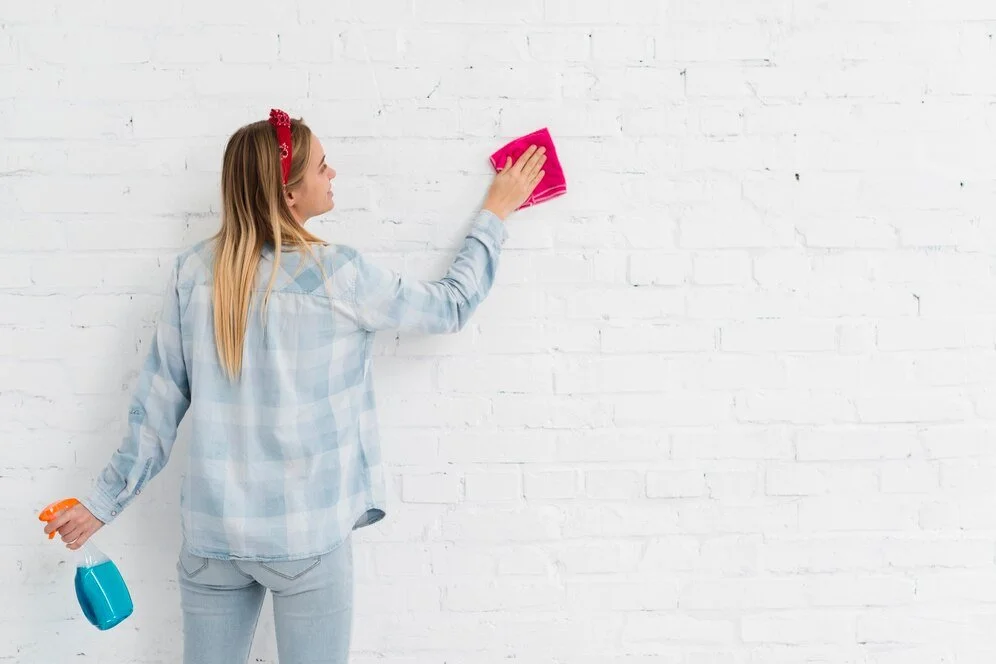
6. Clean the Surface
After removing the bulk of the glue, it’s essential to clean the wall surface thoroughly to ensure it’s ready for any further treatment or decoration:
1. Wipe Down the Wall
Clean Sponge or Cloth: Use a clean sponge or cloth soaked in warm water to wipe down the wall. This step helps to remove any remaining glue residue and any leftover cleaning solution.
Thorough Cleaning: Pay attention to all areas, ensuring that you remove all traces of glue. Wipe in gentle, circular motions to lift off any residual adhesive.
Multiple Passes: For particularly stubborn areas, you may need to repeat the wiping process multiple times. Ensure the sponge or cloth remains clean by rinsing it frequently.
2. Dry the Wall
Dry Cloth: After wiping down the wall, use a dry cloth to gently wipe the wall dry. This step helps to remove any remaining moisture and prevents water spots.
Inspect for Residue: As you dry the wall, inspect it for any remaining glue residue. If you find any, repeat the cleaning and drying process.
3. Smoothing the Surface (Optional)
Sandpaper: If necessary, use fine-grit sandpaper to smooth out any rough spots left behind by the glue removal process. This is particularly important if you plan to paint or apply new wallpaper, as a smooth surface ensures better adhesion and a more professional finish.
Light Sanding: Sand lightly and evenly, taking care not to damage the wall surface. Wipe away any dust with a dry cloth after sanding.
By thoroughly cleaning and drying the wall, and smoothing any rough spots, you ensure that the surface is properly prepared for any further decoration. This careful attention to detail helps achieve a clean and smooth finish, whether you’re repainting, wallpapering, or leaving the wall as is.

Tips and Tricks for a Smooth Finish
Stay Patient
Removing wallpaper glue can indeed be a bit of a chore, but patience is crucial for success. Start by gathering your tools and prepping the area to ensure you have everything you need. Apply a solution of water and mild detergent or a commercial adhesive remover to the glue, allowing it to sit and soften the adhesive. Gently scrape off the glue using a putty knife or scraper, being careful not to damage the wall underneath. For stubborn spots, reapply the solution and give it more time to work. Rinse the area with clean water to remove any residue and let it dry completely. By taking your time and not rushing, you’ll achieve a clean surface ready for a fresh coat of paint or new wallpaper.
Use the Right Tools
A good-quality scraper can make a world of difference when removing wallpaper glue. Opt for a scraper with a comfortable handle that fits well in your hand, as this will reduce strain during extended use. The blade should be sharp and sturdy to effectively lift and remove stubborn glue without damaging the wall surface. Stainless steel blades are a great choice for their durability and resistance to rust. A wide blade can cover more area at once, making the job quicker, while a narrower blade may be better for detailed work or tight corners. Investing in a high-quality scraper ensures a smoother, more efficient removal process and helps achieve a clean, prep-ready surface for your next project.
Consider a Wallpaper Steamer
For particularly stubborn wallpaper glue, a wallpaper steamer can be a game-changer. This tool uses steam to penetrate and soften the adhesive, making it significantly easier to remove. The steam helps break down the glue’s bond with the wall, allowing you to scrape it off more efficiently. To use a steamer, apply the steam to the glued area for a few minutes, allowing it to work its magic. Be sure to keep the steamer moving to avoid over-saturating any one spot. While a steamer can greatly simplify the removal process, it's essential to follow manufacturer instructions and take proper safety precautions to prevent damage to your walls or personal injury.
Ventilate the Room
Keeping the room well-ventilated during wallpaper glue removal is crucial for a smoother process. Proper airflow helps the walls dry faster and minimizes any strong odors from cleaning solutions. Open windows and doors to create a cross-breeze, and consider using fans to enhance air circulation. Ventilation not only speeds up the drying time but also ensures that any lingering fumes dissipate quickly, improving the overall working environment. Adequate ventilation helps maintain a healthier atmosphere and prevents potential respiratory issues, making your wallpaper removal project more comfortable and efficient. By prioritizing ventilation, you'll achieve better results and a more pleasant experience.
Conclusion
Removing wallpaper glue doesn’t have to be a sticky situation. With the right tools, a bit of patience, and our step-by-step guide, you can Learn How to Remove Wallpaper Glue Easily and prepare your walls for their next chapter. Whether you’re planning to repaint, re-wallpaper, or simply enjoy the clean, glue-free surface, these tips will help you achieve a smooth and professional finish. So, put on some gloves, grab your scraper, and get ready to say goodbye to that stubborn glue. Happy decorating!
Frequently Asked Questions
Can I use a chemical wallpaper remover?
Yes, there are chemical removers available specifically for wallpaper glue. However, these can be harsh and are often unnecessary. Start with water-based solutions first.
What if the glue doesn’t come off easily?
If the glue is particularly stubborn, consider using a wallpaper steamer or adding more vinegar to your solution. In some cases, a commercial adhesive remover may be needed.
Will removing wallpaper glue damage my walls?
If done carefully, removing wallpaper glue shouldn’t damage your walls. Always use gentle methods first and avoid harsh scrapers or abrasive materials.
How long does it take to remove wallpaper glue?
The time it takes depends on the size of the area and the amount of glue. It can range from a couple of hours to a full day for larger rooms.
Do I need to sand the walls after removing the glue?
Sanding is not always necessary but can help smooth out any rough patches left by the glue. Use fine-grit sandpaper and work gently.